Perfect Pie Crust
Simple instructions for how to make a pie crust that is light and flaky. This recipe works with shortening, butter or lard and rolls very easily.
Among the realm of baking there exists a quest for many people – the pie crust. Achieving the perfect pie crust is often viewed as an overwhelming challenge. But, it is far more attainable than most people think. Mixing, rolling and baking a pie crust is a balance of simplicity and finesse. With a handful of simple steps, and a touch of patience, making a pie crust can become an accessible and rewarding kitchen endeavour.
What Makes This Pie Crust Perfect?
A perfect pie crust is desired because it creates a delicious and visually appealing finished product. There are a few key factors that contribute to a perfect pie crust:
- Flaky – A good pie crust should be light and flaky. This is achieved by using cold ingredients (such as butter or shortening), which creates small pockets of fat in the dough that melt during baking and create the desired flaky texture.
- Tender – The crust should be tender and not tough or chewy. This can be achieved by not overworking the dough.
- Golden Colour – A perfectly baked pie crust should not just be flaky, but it will have a golden brown colour. Along with baking the pie at the right temperature and time, I also find that brushing the top of the pie with an egg wash or milk/cream before baking, can give the pie that beautiful golden colour.
- Flavour – A great pie crust should have a delicious but simple flavour. The pie crust should be a vehicle to showcase the flavours of the filling.
What Kind Of Fat To Use
A perfect pie crust requires the right combination of just a few key ingredients. One of those ingredients is the fat. People who make pie crusts a lot will have their favourites with some claiming butter is the best and other people raving over shortening, lard and tallow. While I do really like the buttery taste of a pie crust made with butter, I typically use shortening.
Some of the reasons I use shortening include:
- Rolls Easy – I find that out of all the fats that can be used, shortening allows the crust to roll out the easiest without cracking or splitting.
- Economical – butter is getting expensive lately and shortening is a fair bit cheaper option.
- Flaky – Shortening results in a pie crust that is light, flaky and delicious!
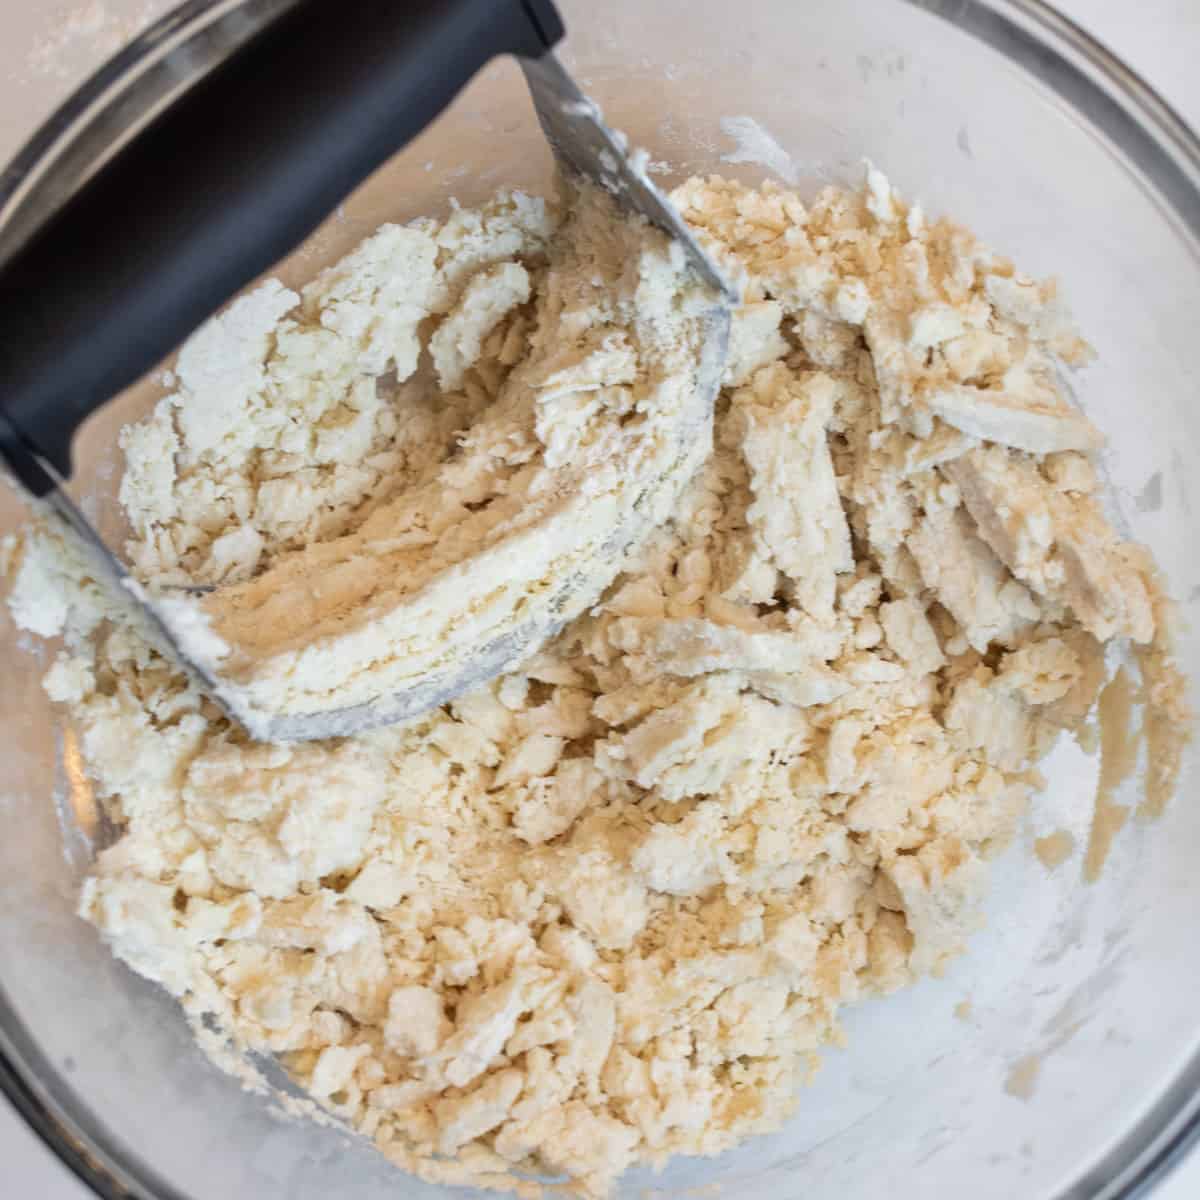
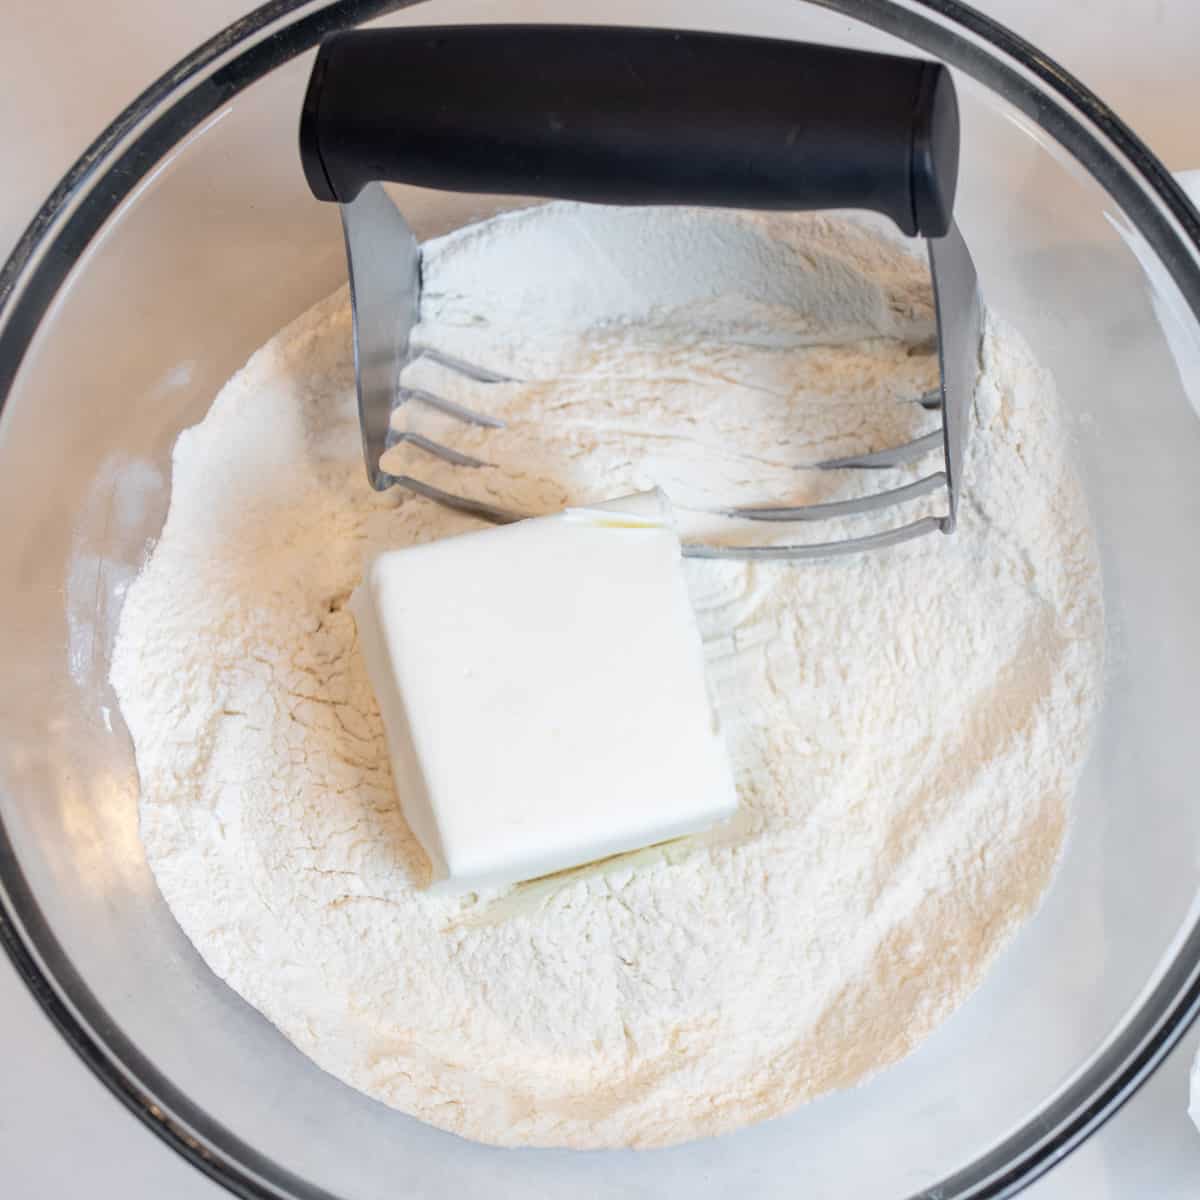
How To Cut Shortening Into Flour
Cutting the shortening (or any fat like butter, lard or tallow) into flour is a common technique used in baking to create a flaky texture in pastries, biscuits, and pie crusts.
To cut shortening into flour, you can follow these steps:
- Whisk together the flour with the salt in a mixing bowl.
- Make sure the shortening (or other fat) is chilled. Take it out of the fridge right when you are ready. If desired, you can cut the shortening into small cubes or pieces for easier handling.
- Using a pastry cutter or two knives, cut the shortening into the flour. Hold one knife in each hand and cross them over each other, slicing through the mixture repeatedly.
- Continue cutting the shortening into the flour until the mixture resembles coarse sand texture with small pea-sized bits of shortening evenly distributed throughout the flour.
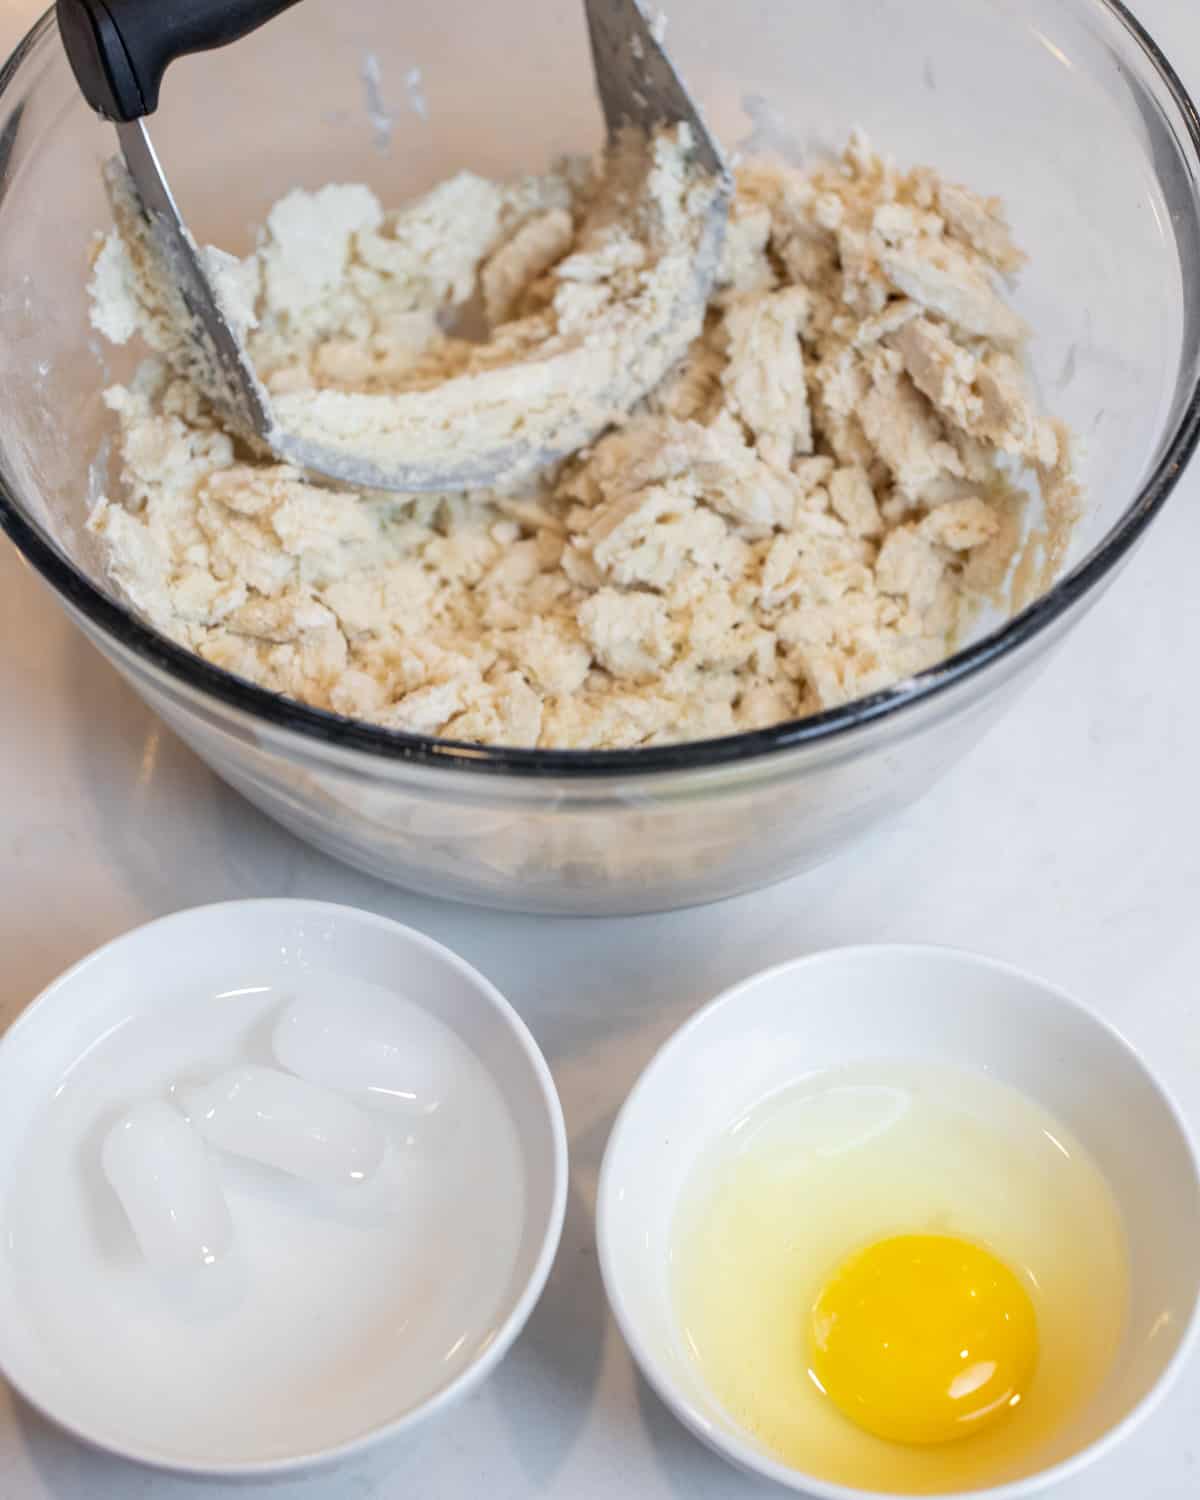
Add In Wet Ingredients
Once the fat is cut into the flour, it is time to mix in the wet ingredients.
- In a small bowl, whisk together the egg and the vinegar.
- Then, fill another small bowl with a few ice cubes. The ice cubes will keep the water very cold prior to be mixing into the pie dough.
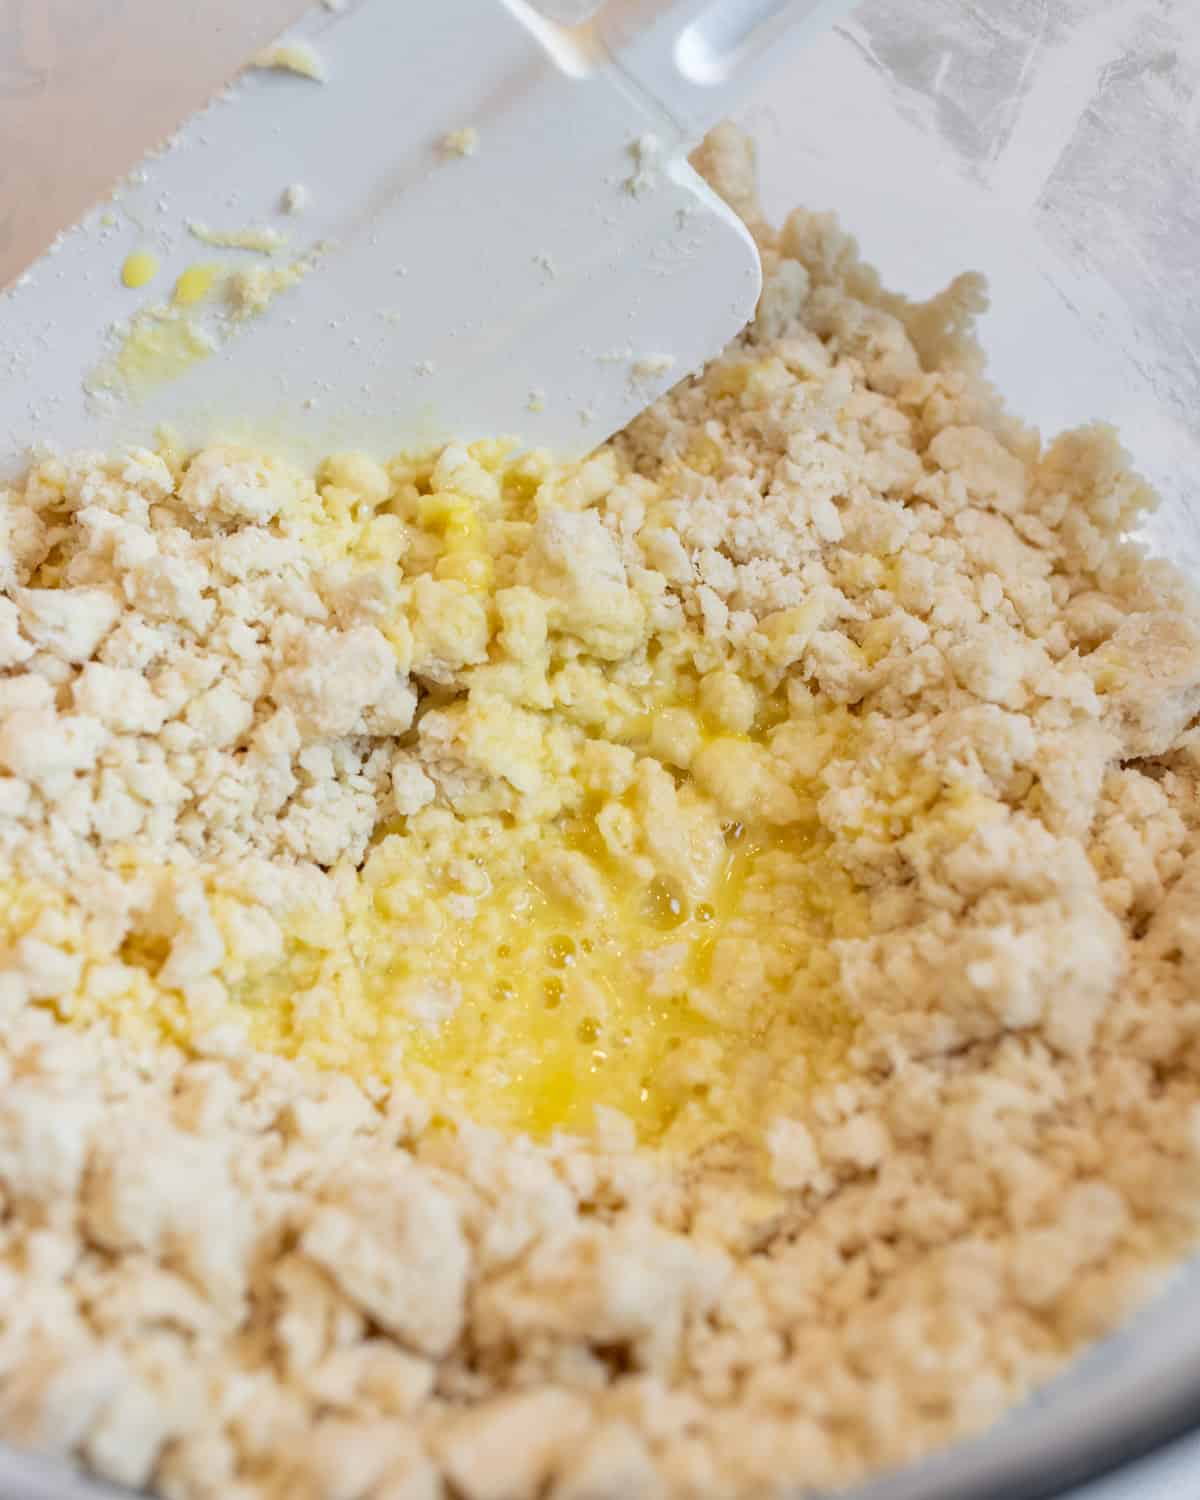
Pour the mixed egg and vinegar into the bowl with the flour and shortening. Stir and fold the wet ingredients in with a rubber spatula or large spoon. Then mix in one tablespoon of ice water at a time. Continue mixing until the dough is just starting to bind together. I find that I only need to add in about 2 tablespoons of the water until the pie dough is ready.
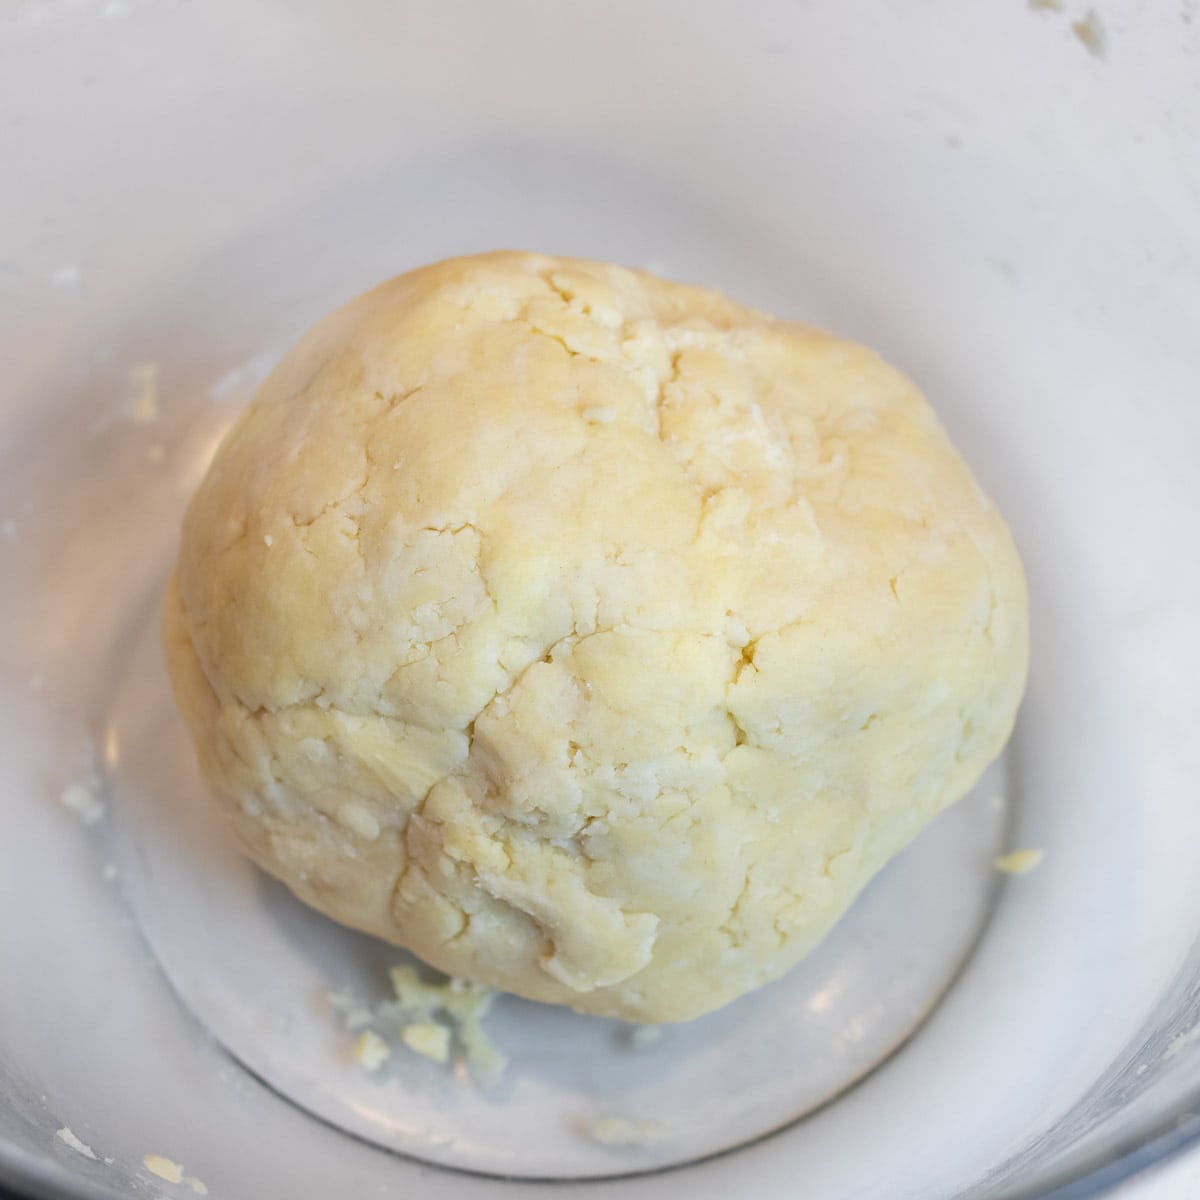
Once the pie dough has been gently kneaded, shape it into a ball.
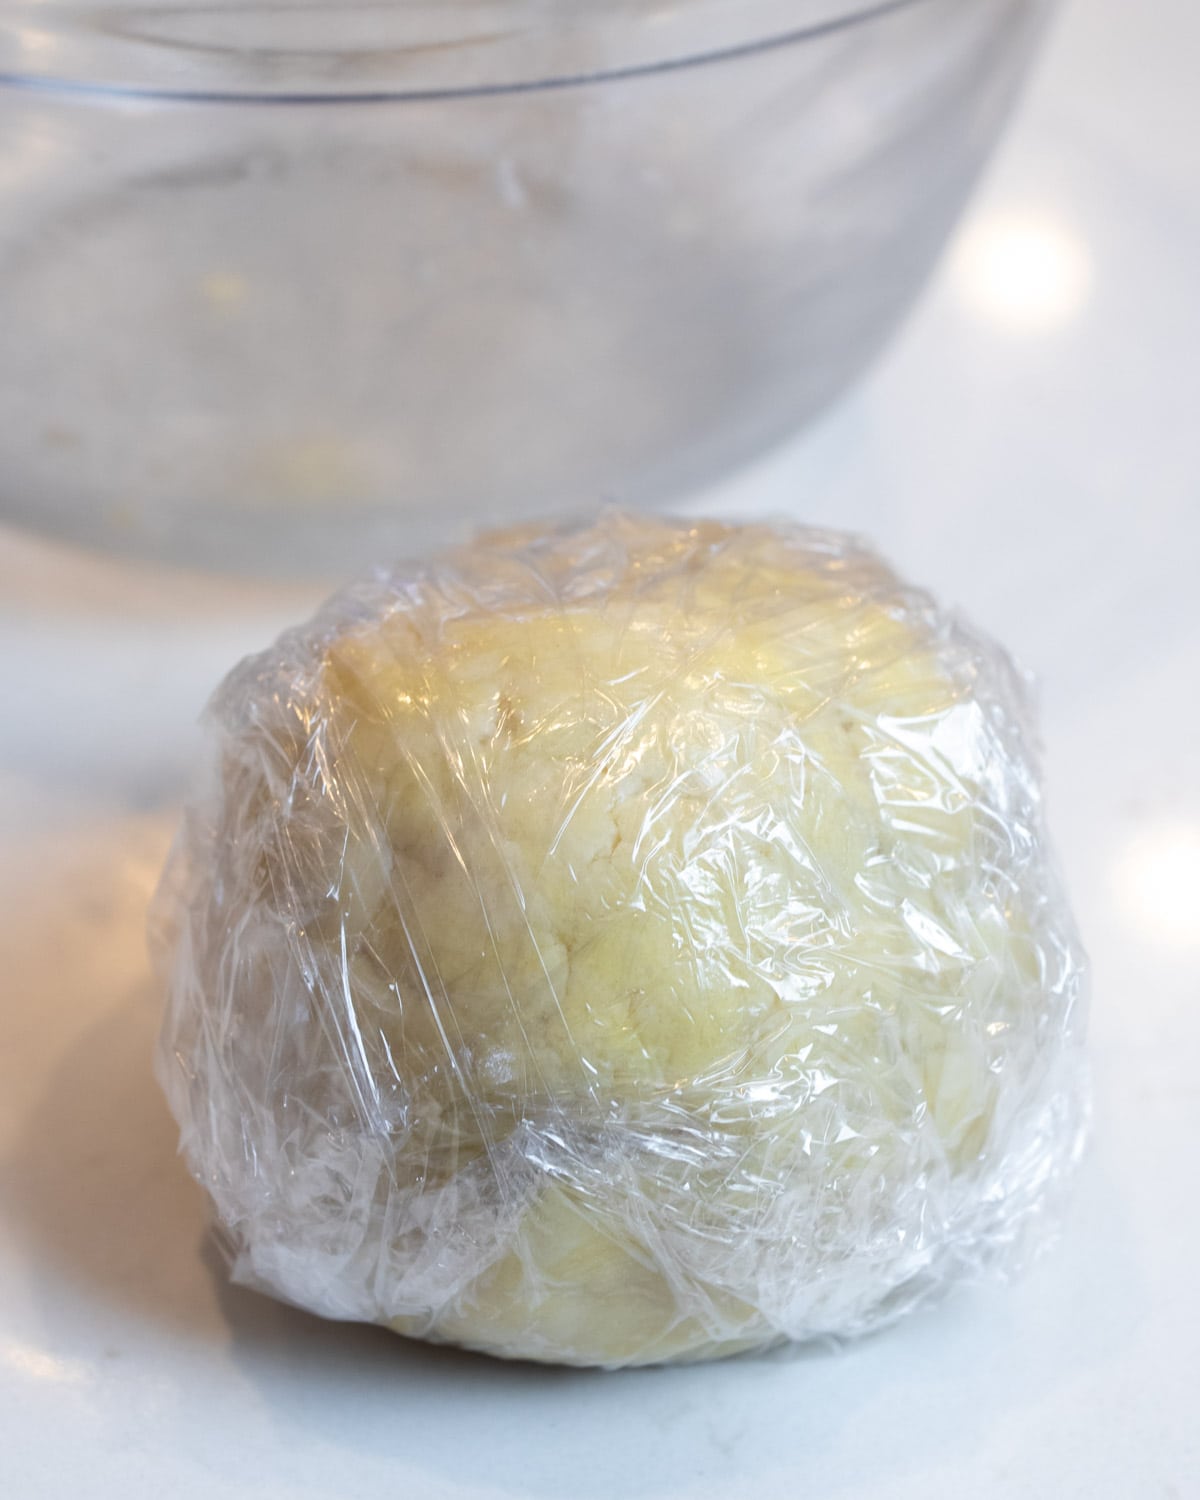
Chill Dough In Fridge
Wrap the ball of dough with plastic wrap. Place it in the fridge so that it can chill. Keep it in the fridge for at least an hour. I typically let the dough chill in the fridge for about 2 hours.
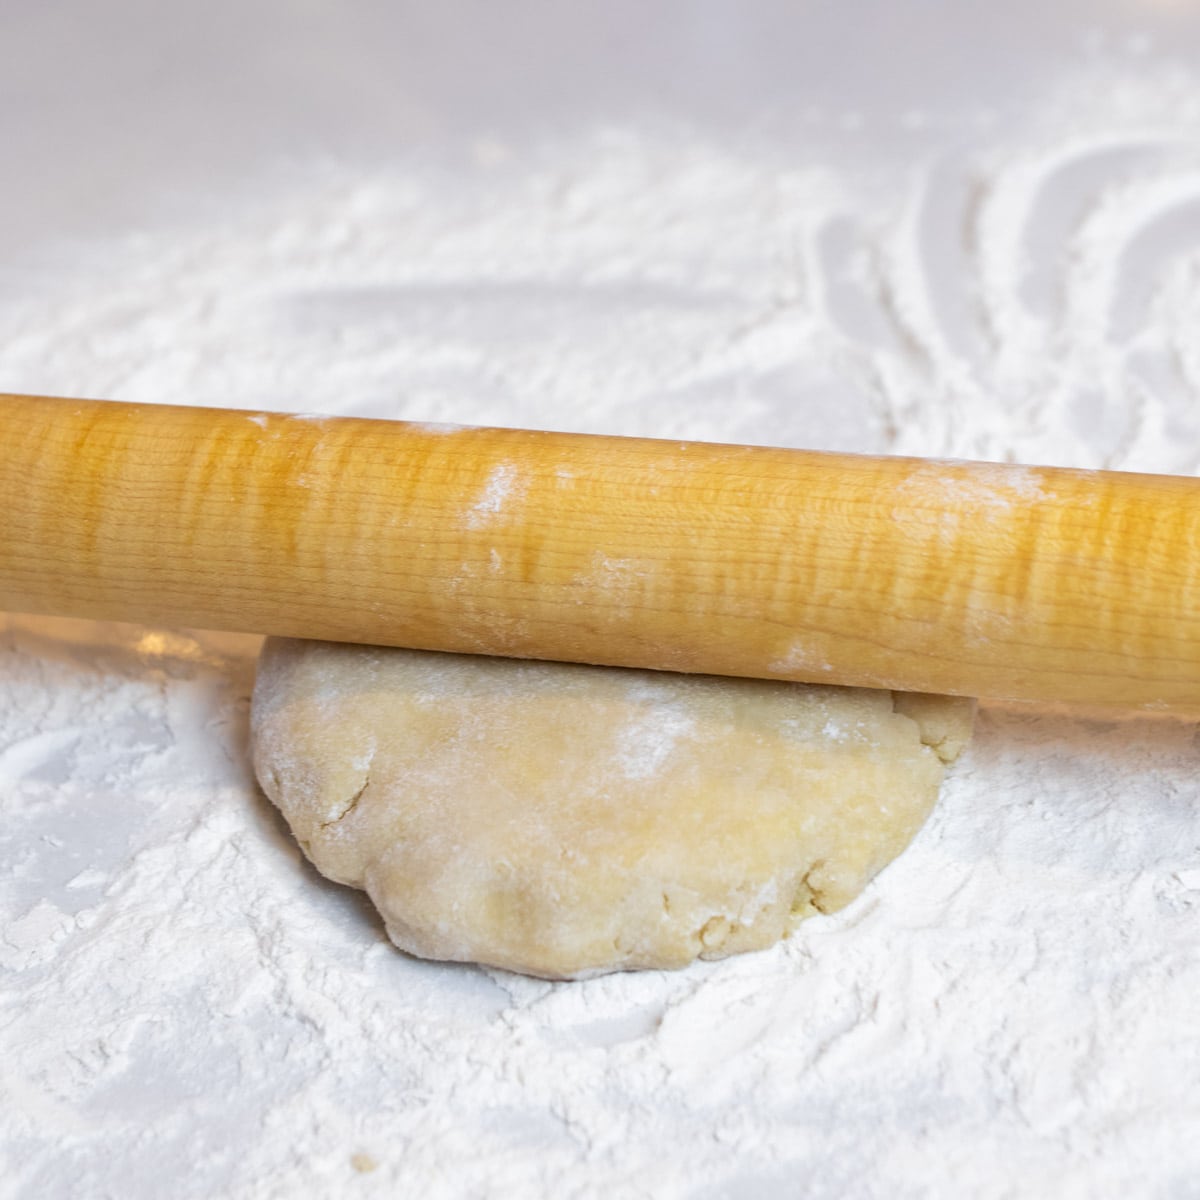
How To Roll Pie Crust
Take the dough out of the fridge. This recipe provides enough dough for one complete pie (top and bottom crusts), or 2 pies that do not have a top crust. So, cut the ball of dough in half, so that you can roll each half individually.
Lightly dust the surface of the rolling area with some flour. I like to roll the pie crust on our quartz countertop. Place one half of the pie dough on the floured surface.

Use a pastry roller and gently roll it out into an even thickness of 1/8 inch.
- I like to roll from the middle rolling to the outside edge.
- Check every once in a while to make sure that the dough is not sticking to the countertop. You can lift up the edge and throw a little more flour underneath.
- If the dough starts to crack or split, pinch it back together again with your fingers.
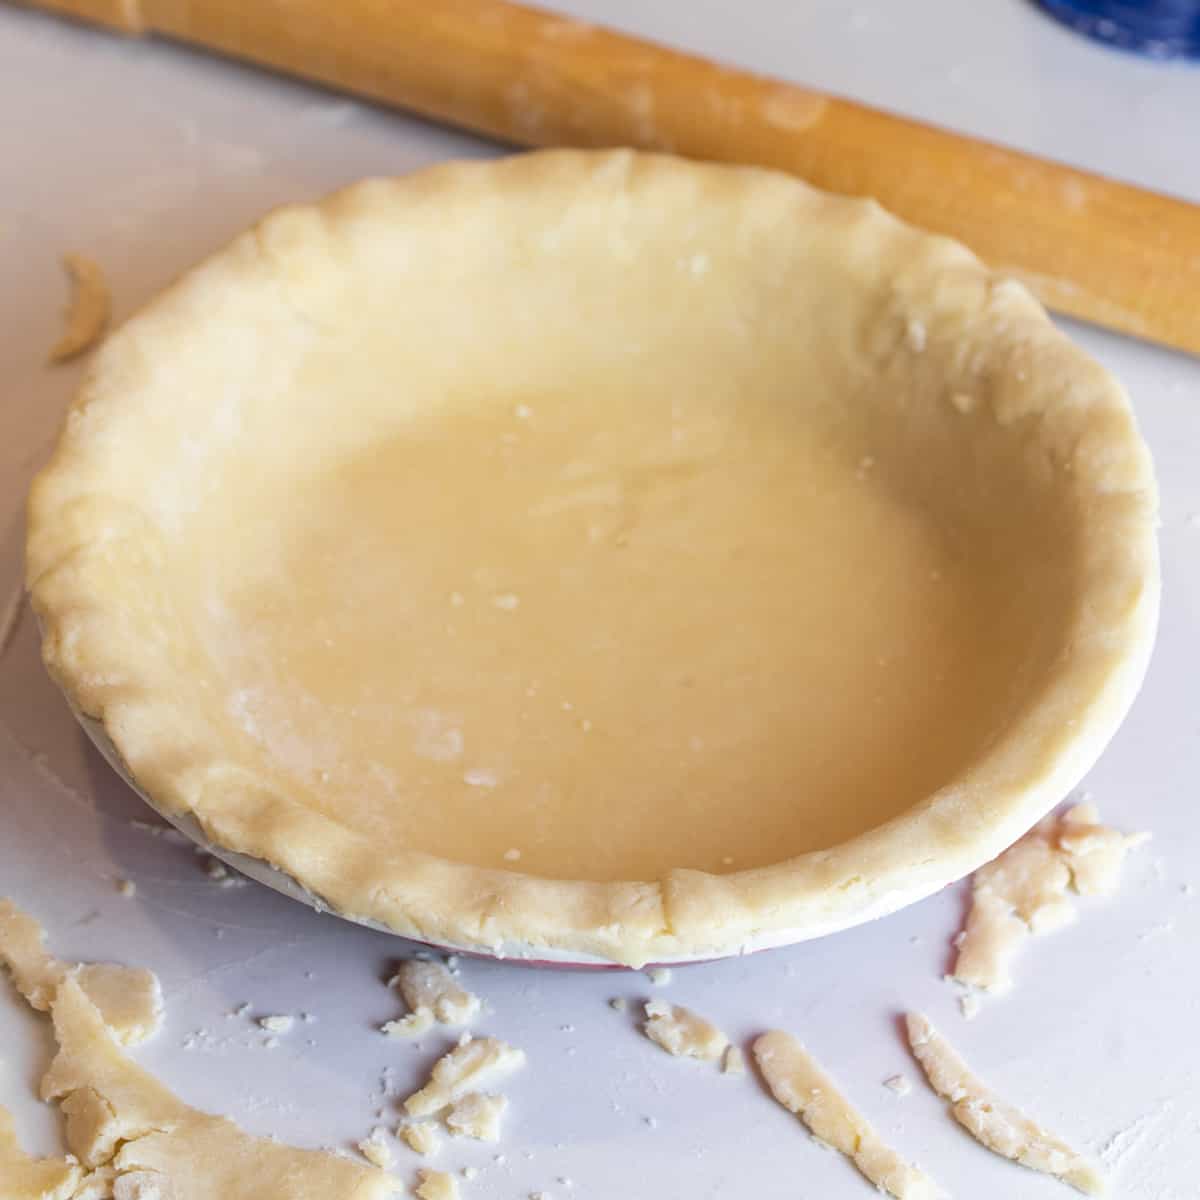
How To Place Crust On Pie Tray
Once the crust is rolled to the desired thickness and size, carefully roll it onto the rolling pin. Lift the rolling pin over the pie dish and then unroll the crust, making sure the crust is centred over the dish. Press the crust into the bottom and long the sides of the pie dish, making sure there are no air pockets. Use a knife to cut the excess dough hanging over the edges.
How To Blind Bake Pie Crust – There are some pies, like lemon meringue and chocolate pudding pies, that require the pie crust to be baking before the filling is added. To do this, after the crust has been placed into the dish, put the dish in the fridge to allow the crust to chill and the fats to solidify. Afterwards, prick the bottom of the pie crust a few times with a fork. If you have ceramic pie weights, you place a sheet of parchment paper on the crust and spread the pie weights across the of the crust. Then bake in a 375F oven for about 20 minutes, or until the pie crust is cooked through and turning golden brown around the edges.
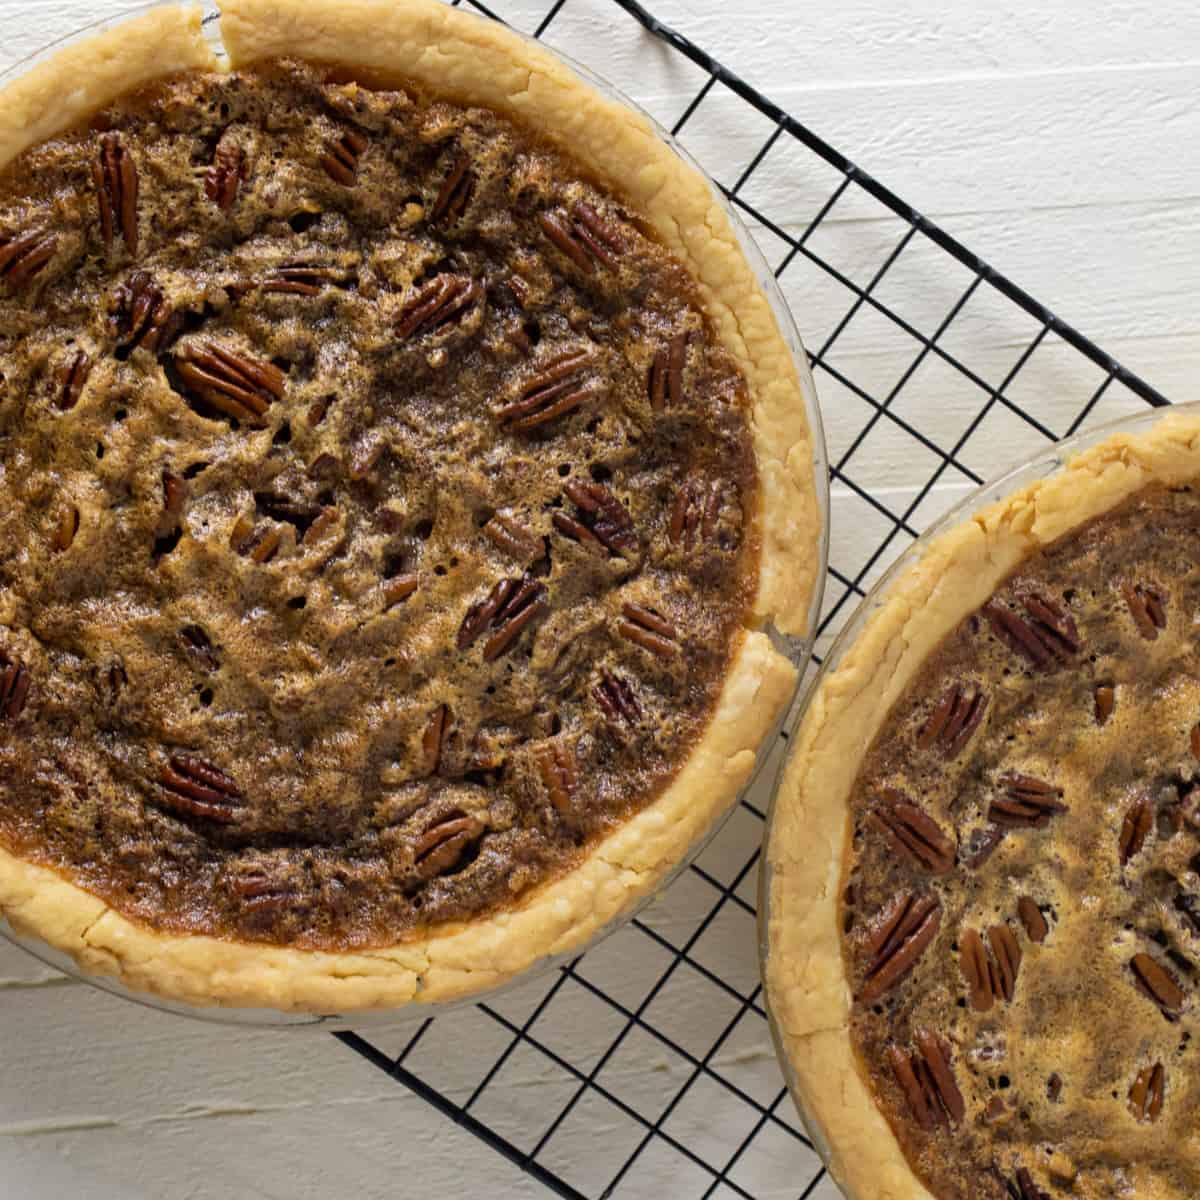
Time For Filling – once the bottom pie crust is in the dish, it is ready for filling. This crust is great for sweet or savoury types of fillings. Some pies are single crust and once you add the filling the pie can be baked. Others are double crust and once the filling is added, you can place the upper crust over top.
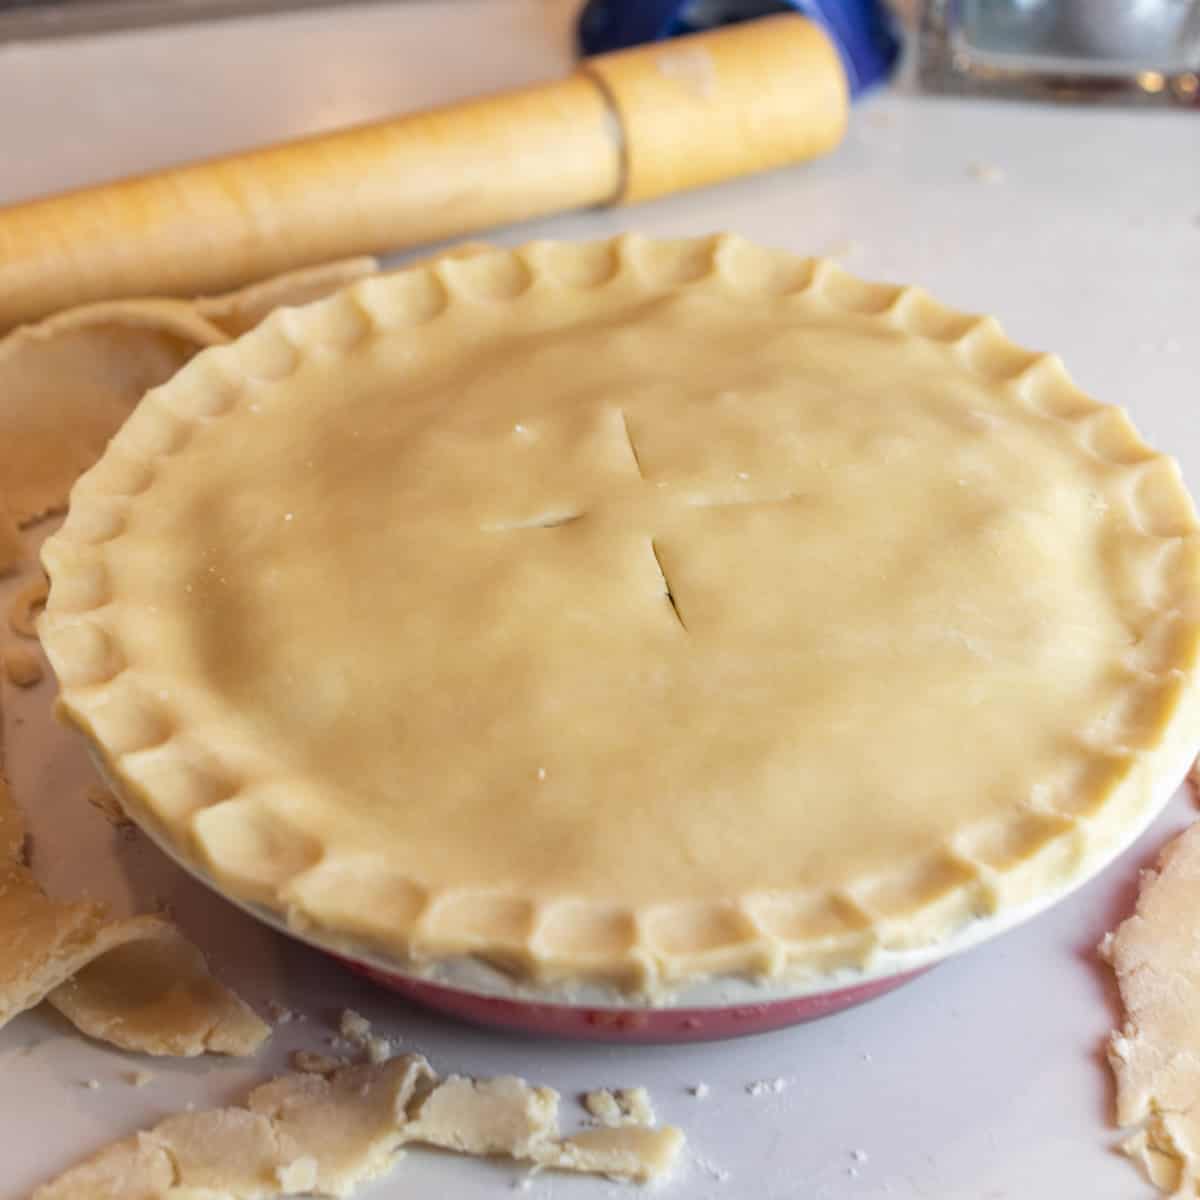
How To Double Crust Pie
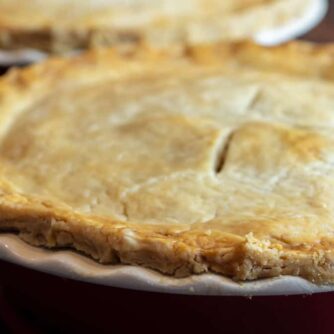
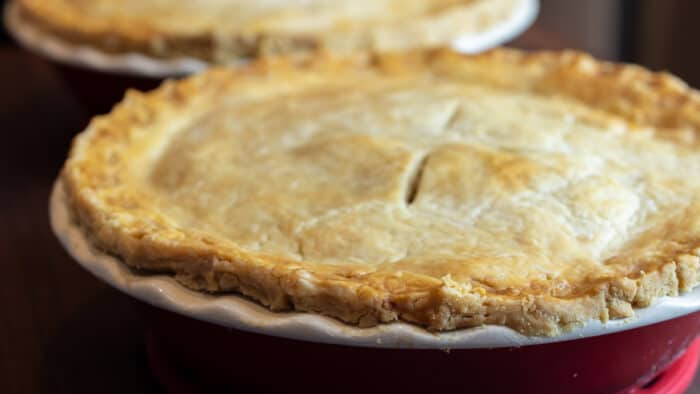
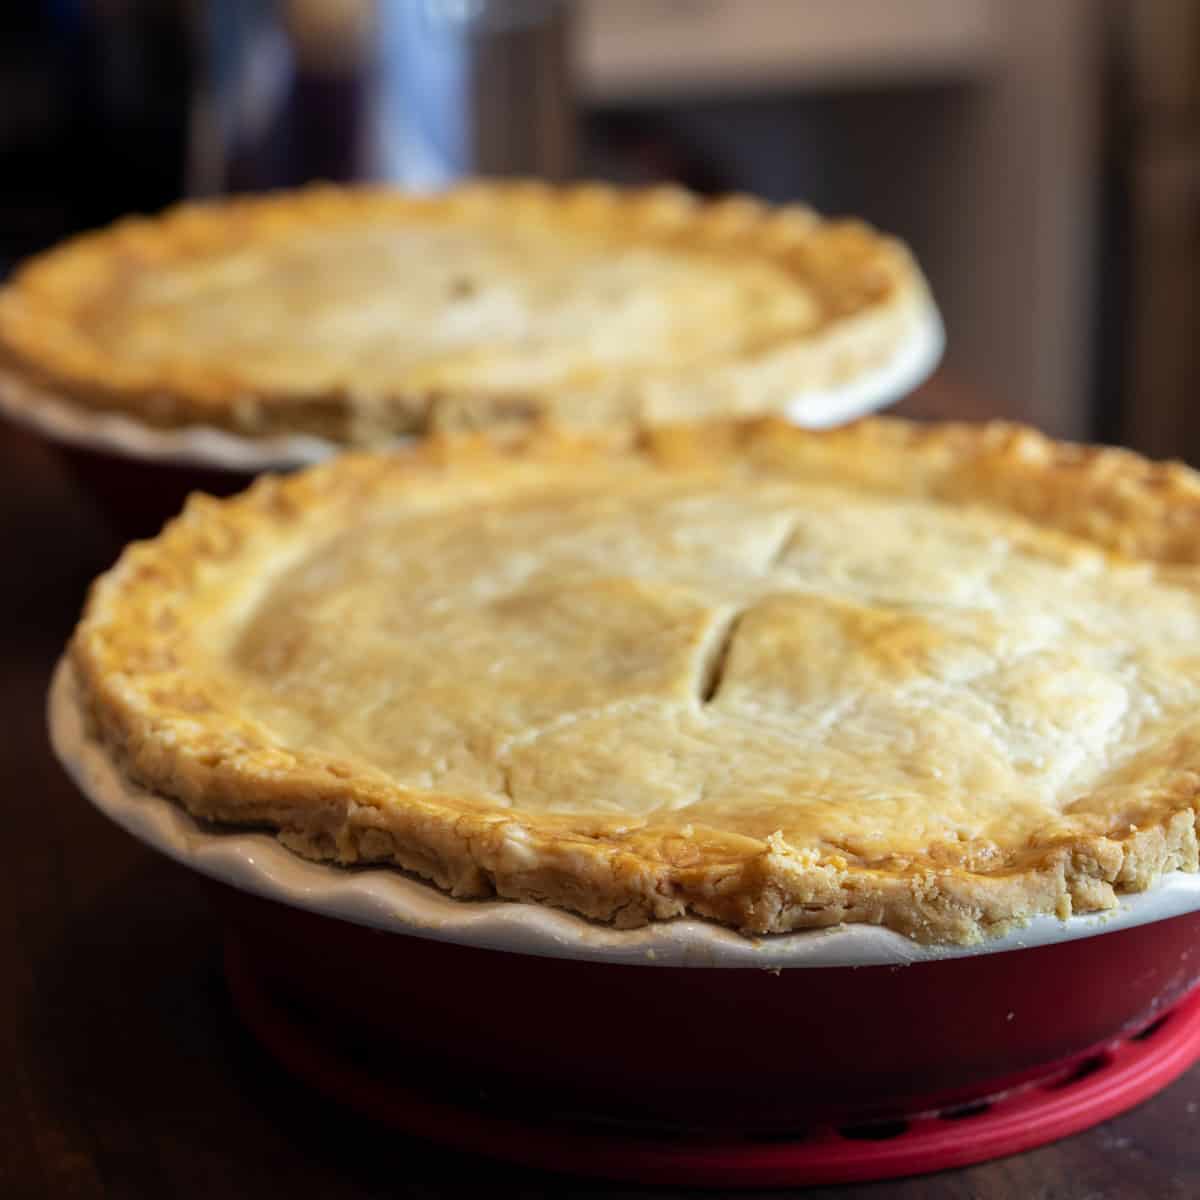
Adding the upper crust to the pie is the same as the bottom. Once rolled to size and thickness, roll it over the rolling pin and carefully lift it over the pie dish so that it covers all the filling. Use a knife to cut all the excess off the sides as you can see in the photo above. Then pinch the sides with your fingers to create a scalloped look. Cut a few slits into the centre to allow air and heat to escape during baking.
Ready To Bake
Once rolled and filling added, the pie is ready to go in the oven. Depending on the type of pie, the filling, and whether there is an upper crust or not, the time and temperature will vary. Follow instructions for the pie recipe to know how the temperature and for how long to bake the pie.
Remember that practice makes perfect when it comes to pie crust. Don’t be discouraged if your first attempts are not flawless. Enjoy the process and embrace the flavor of homemade pie crusts. Happy baking!
Pie Recipes!
If you are looking at this pie crust recipe, then you are likely interested in baking a pie. Here are some of my favourite pie recipes!
- Blueberry Pie – This is my favourite pie on the planet and just packed with lots of blueberries!
- Raspberry Pie – A classic pie, this is sweet and tart with a flaky crust.
- Sweet Potato Pie – If you are looking for a new type of pie for Thanksgiving or any other time of year this pie is perfect. It is packed with the tastes of fall.
Perfect Pie Crust
Ingredients
Pie Crust
- 2 cups flour
- 1 tsp salt
- 1 cup shortening , or lard or butter
- 1 egg
- 1 tbsp vinegar
- 2-4 tbsp water , cold
Instructions
How To Make Pie Dough
- In a large bowl, whisk together the flour with the salt. Use a pastry blender to cut in the lard until it is a coarse meal consistency.
- In a small bowl, whisk the egg with vinegar. Stir into the flour mixture.
- Add some of the cold water, a little at a time and gently knead the pie dough. The dough should come together but not be too wet.
- Gather into a ball, cover with plastic wrap and place in a fridge to chill for at least an hour.
How To Roll Out Pie Dough
- Unwrap the pie dough and cut in half. Each half is enough for one bottom or one top of a pie.
- Flour a surface large enough for rolling pie dough. Roll out half of the pie pastry to 1/8 inch thickness. Make sure there is enough pastry to have it hang over the edge of the pie plate rim.
- Carefully lift the rolled out pie pastry and lay over a pie plate. Press down on all the edges and corners to make sure there are no air pockets on the sides or bottom. Use a knife to trim any off the pastry that is hanging over the rim of the plate. The filling can now be added to the pie shell.
- Roll out the top pie crust the same way as the bottom. Dip a finger in a little water and run it along the rim of the bottom pie shell. This helps the top crust stick and seal to the bottom.
- Gently lay the rolled out pie crust overtop of the filled pie crust. Use a knife to trim any overhanging pastry.
- Use two fingers to press on the rim pf the pie. Press down with the two fingers and push them together. this creates the scallop design on the rim of the pastry.
- The pie is now ready to be baked. Different pies, have different temperatures and times for baking.
Nutrition
Per serving: