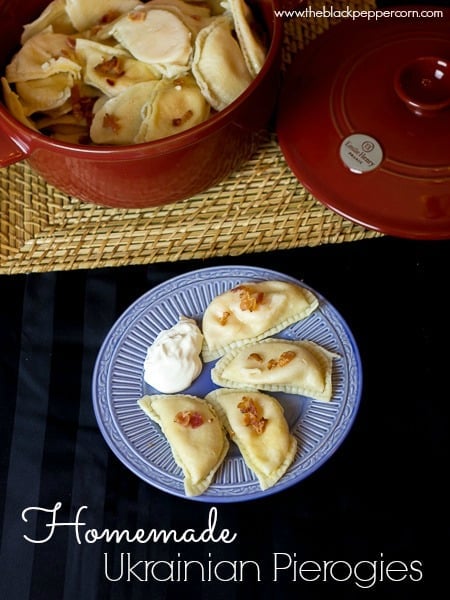
Traditional Ukrainian Pierogies
One of my favorite childhood memories is of my mom working in the kitchen preparing pierogies. She learned the recipe from my grandmother who learned it from her mother. It is a traditional Ukrainian recipe and easily one of my favorite foods to eat. Taking a bite of these homemade pierogies brings me back to those childhood days.
My mom would work away in the kitchen making probably 100 or more of these wonderful Ukrainian dumplings filled with potato and cheese. The tables and kitchen counters would be filled with row upon row of the pierogies. They took a while to make (partially because she would make so many!), but it was a labour of love for my mom. One that she would do for her family.
For me, it is great to learn how to make pierogies the very same way and to carry on the tradition of our family in this way. On top of that, these are the best tasting pierogies around and WAY better than anything you will buy frozen in a store!
There are many different spellings of this little dumpling including pierogi, pirohy, pyrohy, perogy, varenyky, vareniki and more.
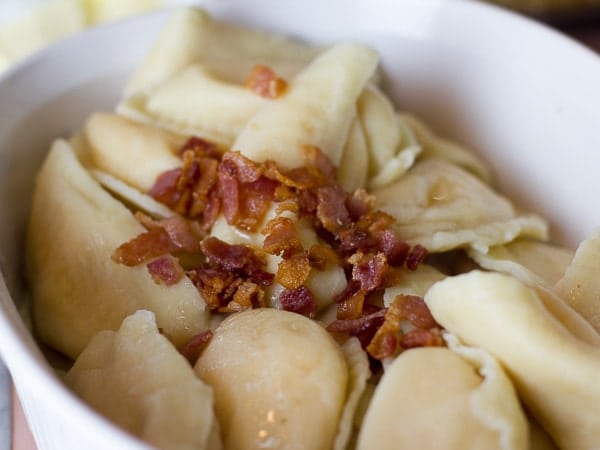
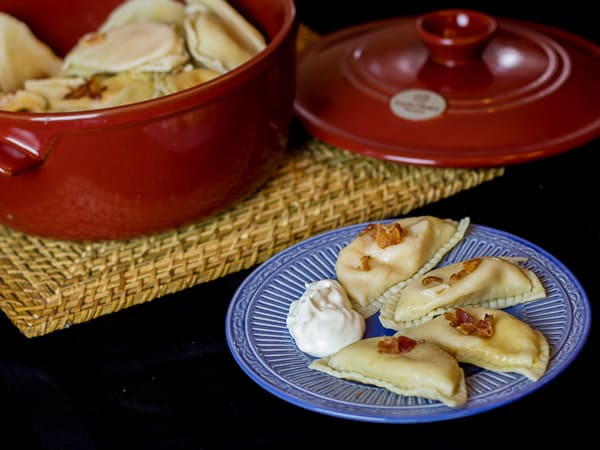
Pierogies are best served with fried pork fat or bacon. The little crispy chunks go perfect with the soft chew of the pierogies. We also traditionally serve them with sour cream.
How to make the filling

The filling is so simple to make: boil potatoes, drain, but set aside, the water. Add cubed cheese and cover with the lid.
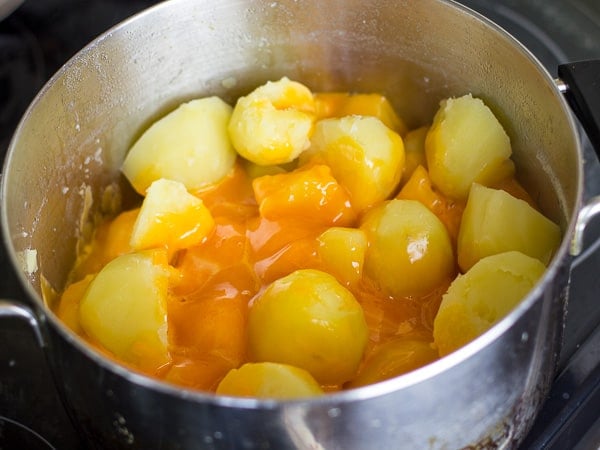
The potatoes should still be very hot and they will cause the cheese to melt after about 5-10 minutes.
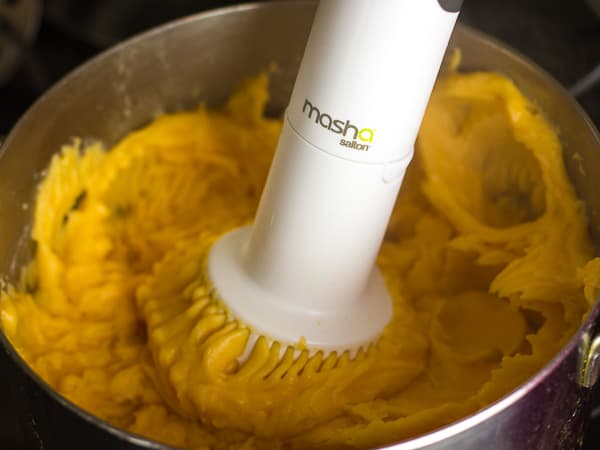
Blend the filling using a hand blender or a hand potato masher.
How to make the dough
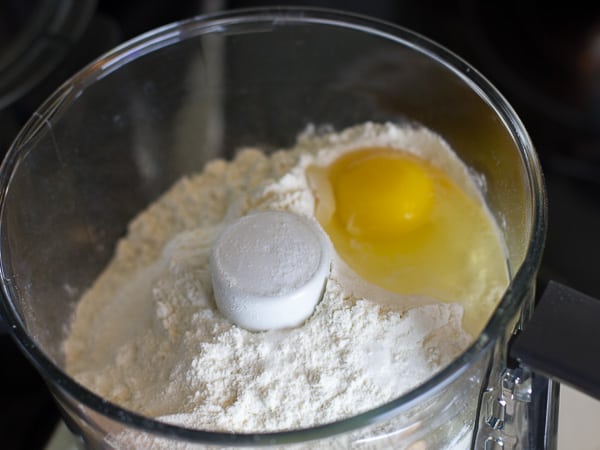
The dough can be made by hand, but a food processor does it far easier and more quickly.
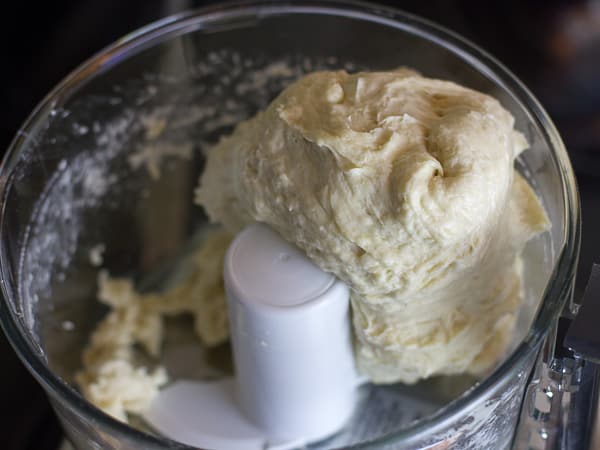
Add the flour, salt and egg to the food processor bowl. Turn it on and slowly pour in the cooled potato water. Stop adding water when the dough forms a ball, as seen in the photo above.
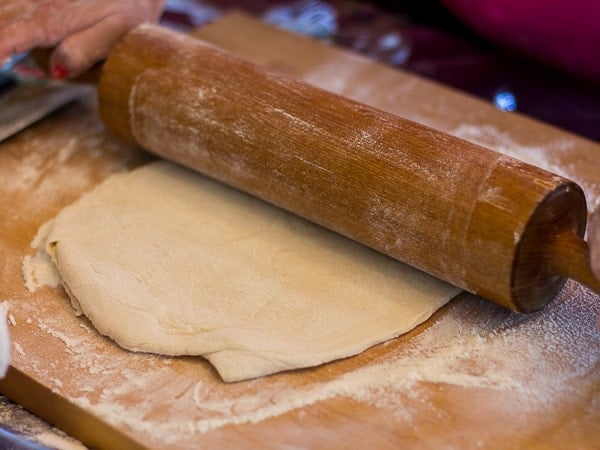
Knead the dough on a floured surface and roll it out to 1/8 inch thick.
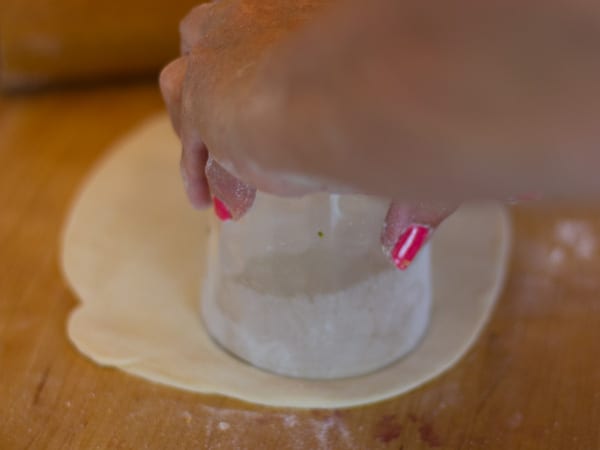
Make rounds with a biscuit cutter or a round glass.
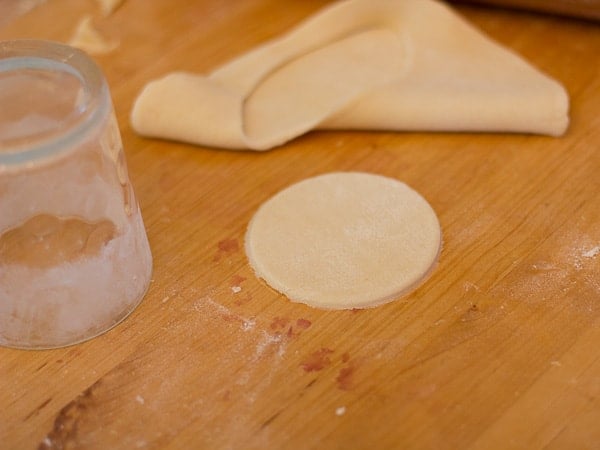
The round of dough should be 3 – 3 1/2 inch in diameter.
How to make the pierogi
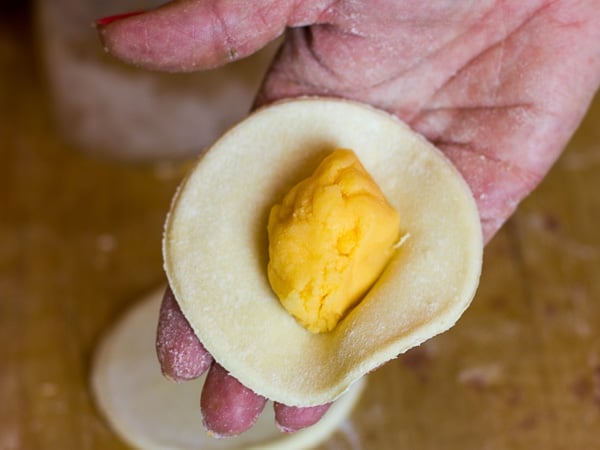
Place the round of dough in your hand and spoon a heaping tablespoon of filling in the middle of the dough.
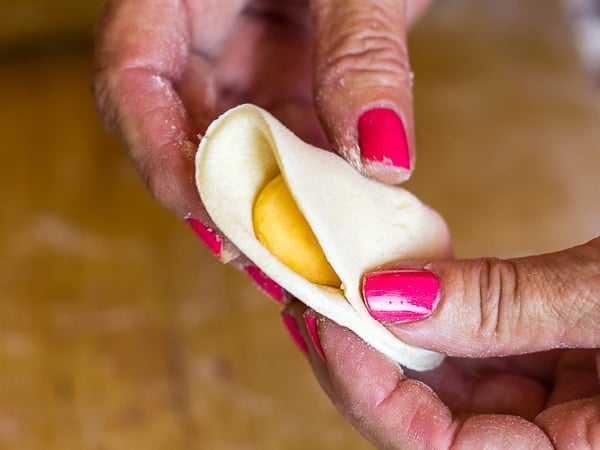
Pull the dough over the filling and pinch it together at the edge.
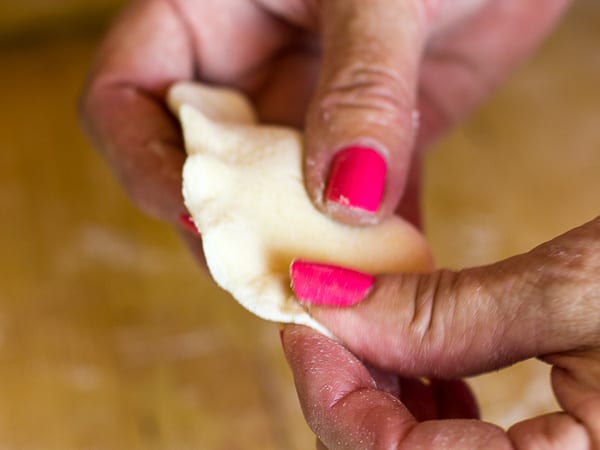
Make sure you pinch firmly so that the pierogi stays sealed during the boiling.

The pierogi is done. Check along the edge to make sure there are no open spots and the seal seems solid.
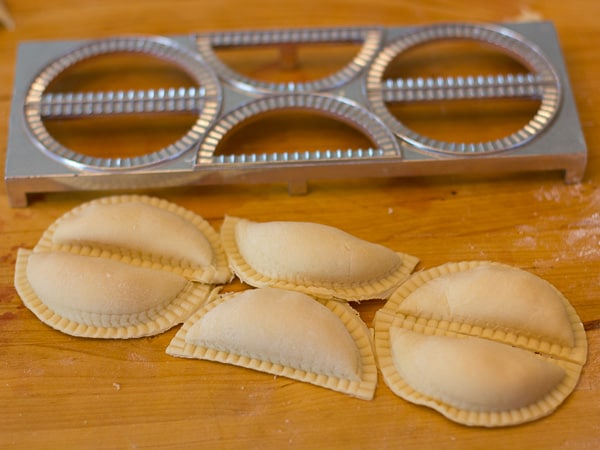
The above instructions are how we traditionally make pierogies. There are pierogi machines available that can make the process a little simpler. We tried out one and it worked out very well. Check out our review of it here: Norpro Pierogi Maker Review.
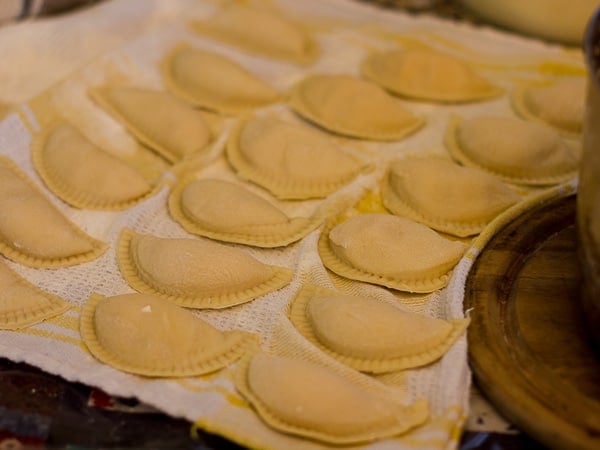
The pierogies take a while to make and the first ones will dry out before you are done if left out in the open. We lay them on a towel. Sprinkle a little flour on the towel and place the pierogies on the towel. Cover with another towel and keep adding more while you make them.
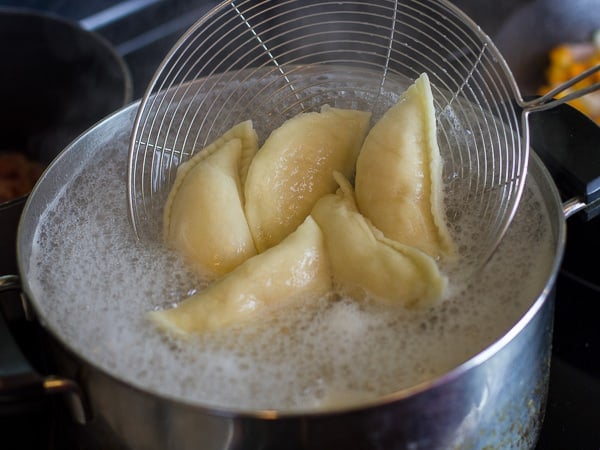
Boil them in water for about 8-10 minutes. They will rise to the surface when they are fully cooked.
Traditional Ukrainian Pierogies

Ingredients
- 2 pounds potatoes peeled and quartered
- 200 g (1/2 pound) medium cheddar cheese, cut into 1 inch cubes
- 1 tsp salt
- 4 cups of flour plus more if needed
- 1 egg
- 1/2 tsp salt
- 1 cup potato water at room temperature
- diced bacon or pork fat
Instructions
- To make the filling, boil the potatoes until tender. Drain water into a bowl. Set aside for later. Place cubed cheese on top of the cooked potatoes and cover with a lid. Let rest for about 5 minutes so that the cheese will melt. Sprinkle with 1 tsp salt and mash the potatoes and cheese with a hand blender, potato masher. Let cool to room temperature.
- To make the dough, add the flour, egg and 1/2 tsp salt to a food processor bowl. Turn on the food processor. Slowly pour in the potato water until the dough forms a ball and then turn off the food processor.
- Place the dough on a floured surface. Knead with floured hands. The dough should have the feel of pizza dough, elastic but not wet. Work in a little extra flour if the dough is too moist.
- Divide the dough in 3. Roll out one ball of dough to 1/8 inch thickness. Use a pierogi press to make pierogies or use the instructions below to make them by hand.
- Use a biscuit cutter or glass. Dredge the rim of a 3 to 3 1/2 inch glass in flour, then press the glass into the rolled out dough to cut a circle of dough. Place the dough round in your hand and spoon about a heaping tablespoon of potato and cheese filling into the middle of the dough. Pull the dough over the filling and pinch the edges. If the dough is dry, moisten a finger in water to help seal the edge.
- Place the pierogi on a towel sprinkled with flour. Cover with another towel so the pierogi does not dry out. Continue to make the remaining pierogies.
- To cook the pierogies, place them in boiling for about 8-10 minutes. The pierogies should rise to the surface of the water when they are finished cooking.
- While the pierogies are boiling, fry the bacon or pork fat, until browned and crisp.
- Toss the cooked pierogies in bacon, and bacon grease or the pork fat.
- Serve with sour cream.