Classic Butter Tarts
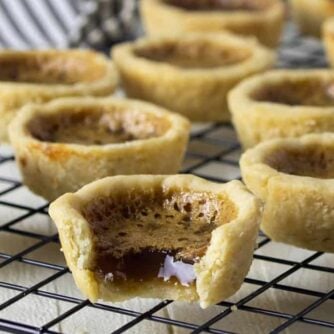
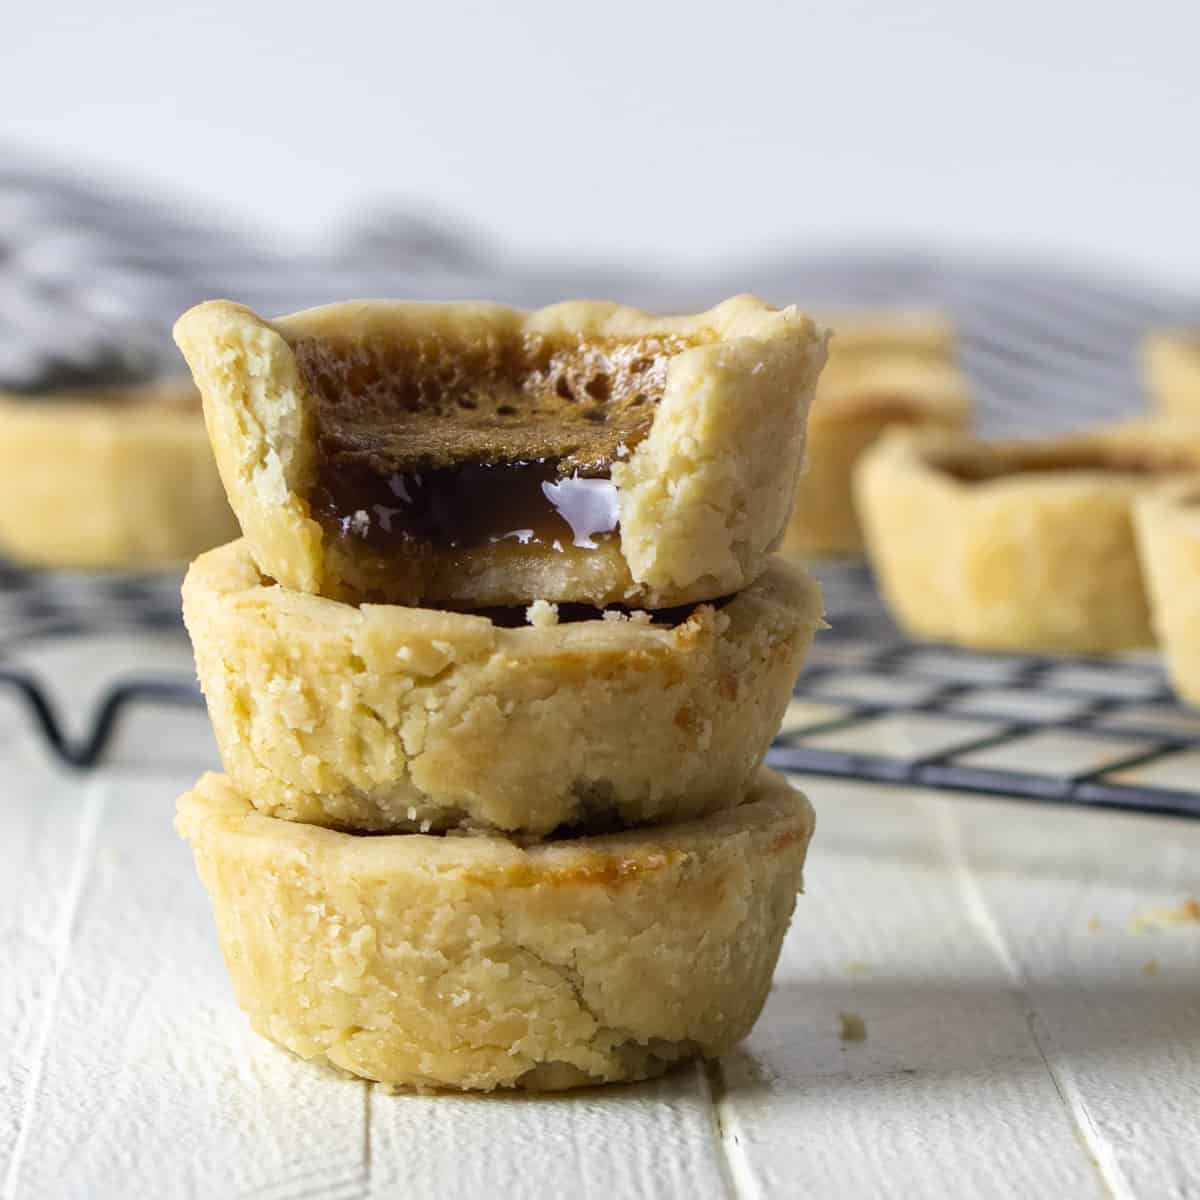
These butter tarts are a truly classic Canadian dessert. They have a soft flaky crust and the glossy filling is smooth, sweet and buttery.
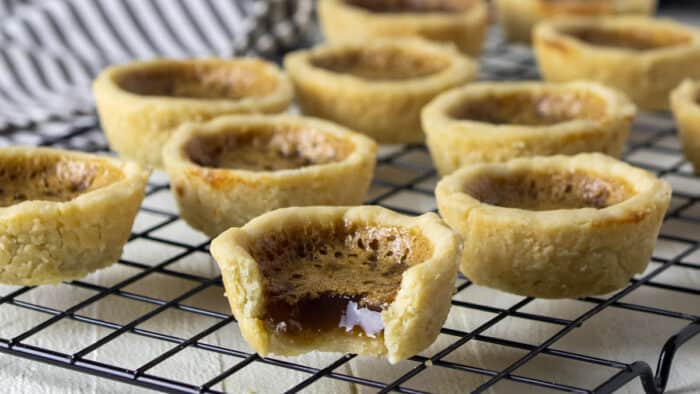
Oh how I love butter tarts! This recipe comes straight from my grandmother and they are the best butter tarts I have ever had. The tart shell is homemade pastry that is surprisingly simple to make and easy to roll out. The filling is smooth and glossy. It is just thick enough to hold its shape. These tarts are a Canadian classic and always a hit over the holidays!
What Makes These Butter Tarts So Good?
There are two parts to a classic butter tart – the pastry crust and the filling. Both of these aspects have been tested and tried so many times that these butter tarts are the best you will ever taste.
- Just like grandma used to make! These are classic Canadian butter tarts from years past.
- The crust of these butter tarts are so light and flaky that they will almost melt in your mouth.
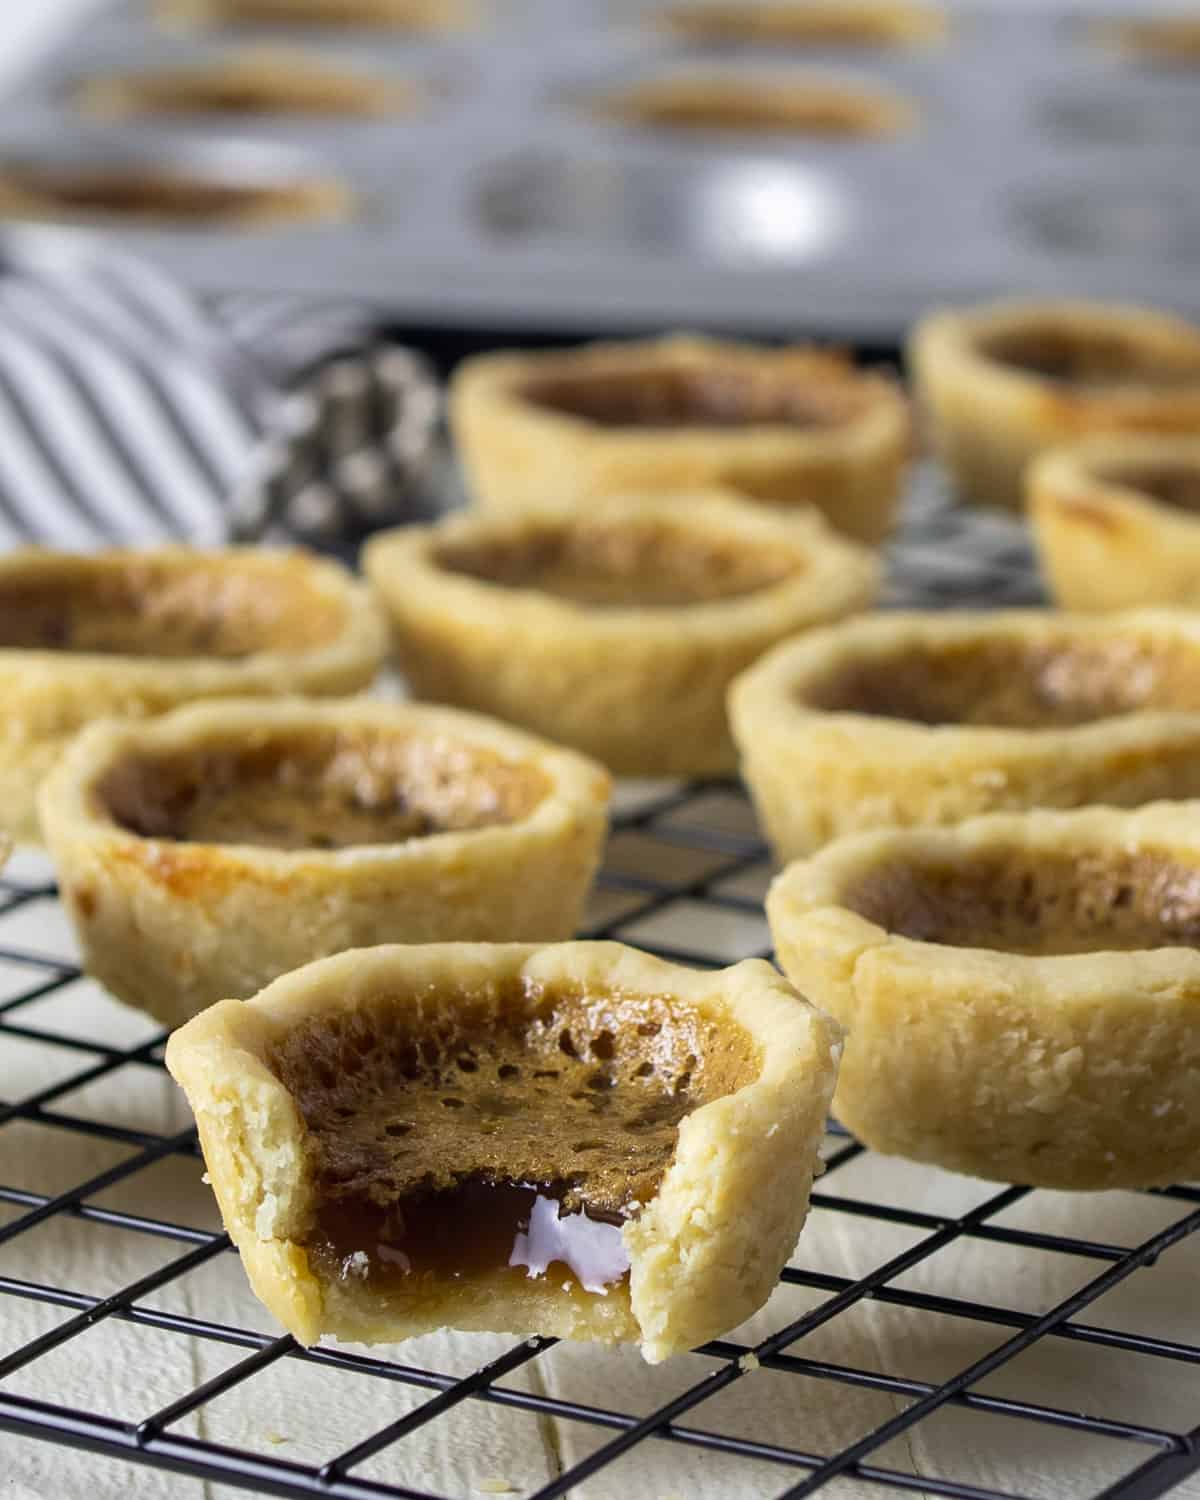
- These butter tarts have a filling that is silky smooth but not so runny that it will pour out after you take a bite. The filling will hold itself in the shell just enough.
- You can add stuff like pecans, raisins and even chocolate chunks to the filling to give these tarts some variety!
How To Make Tart Pastry
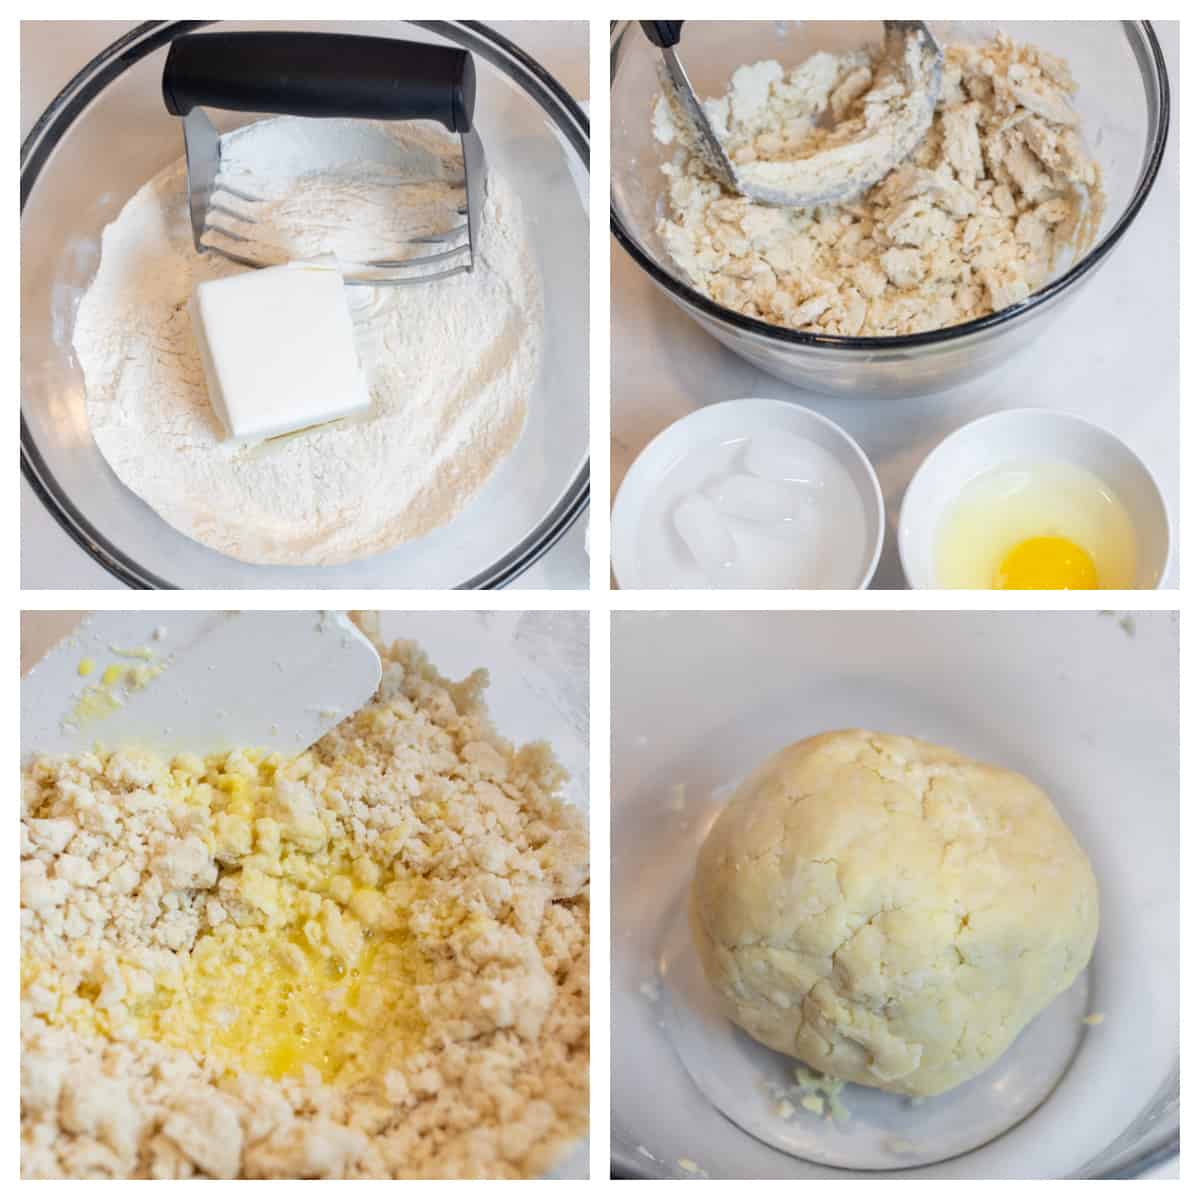
- The first step to making pastry dough is to work the fat into the flour. Whisk the flour and salt together in a large mixing bowl. Add the shortening to the bowl (make sure the shortening is chilled!) and use a pastry cutter to ‘cut’ the fat into the flour. Keep cutting the shortening into the flour until it is crumbly and into small coarse meal.
- In a separate bowl, whisk together the eggs, ice water and vinegar. Pour the egg mixture into the bowl with the flour. Use a rubber spatula or wooden spoon to mix the flour and shortening mixture with the wet ingredients.
- As the dough comes together is should just be wet enough to form into a ball. Once the dough is mixed and lightly kneaded, wrap the ball in plastic wrap and place in the fridge to chill for a minimum of one hour. Make sure to not overwork the dough.
Shortening? Lard? Butter? There are many different fats that would great for pie and tart pastry. Each will work well and in many ways, the choice of which fat to use is a matter of preference. Some people will only use butter, while others prefer lard. I usually use shortening, mostly because I find the pastry rolls great. It is also economical compared to the high price that butter is lately. But all three of these fat options work just fine for these butter tarts.
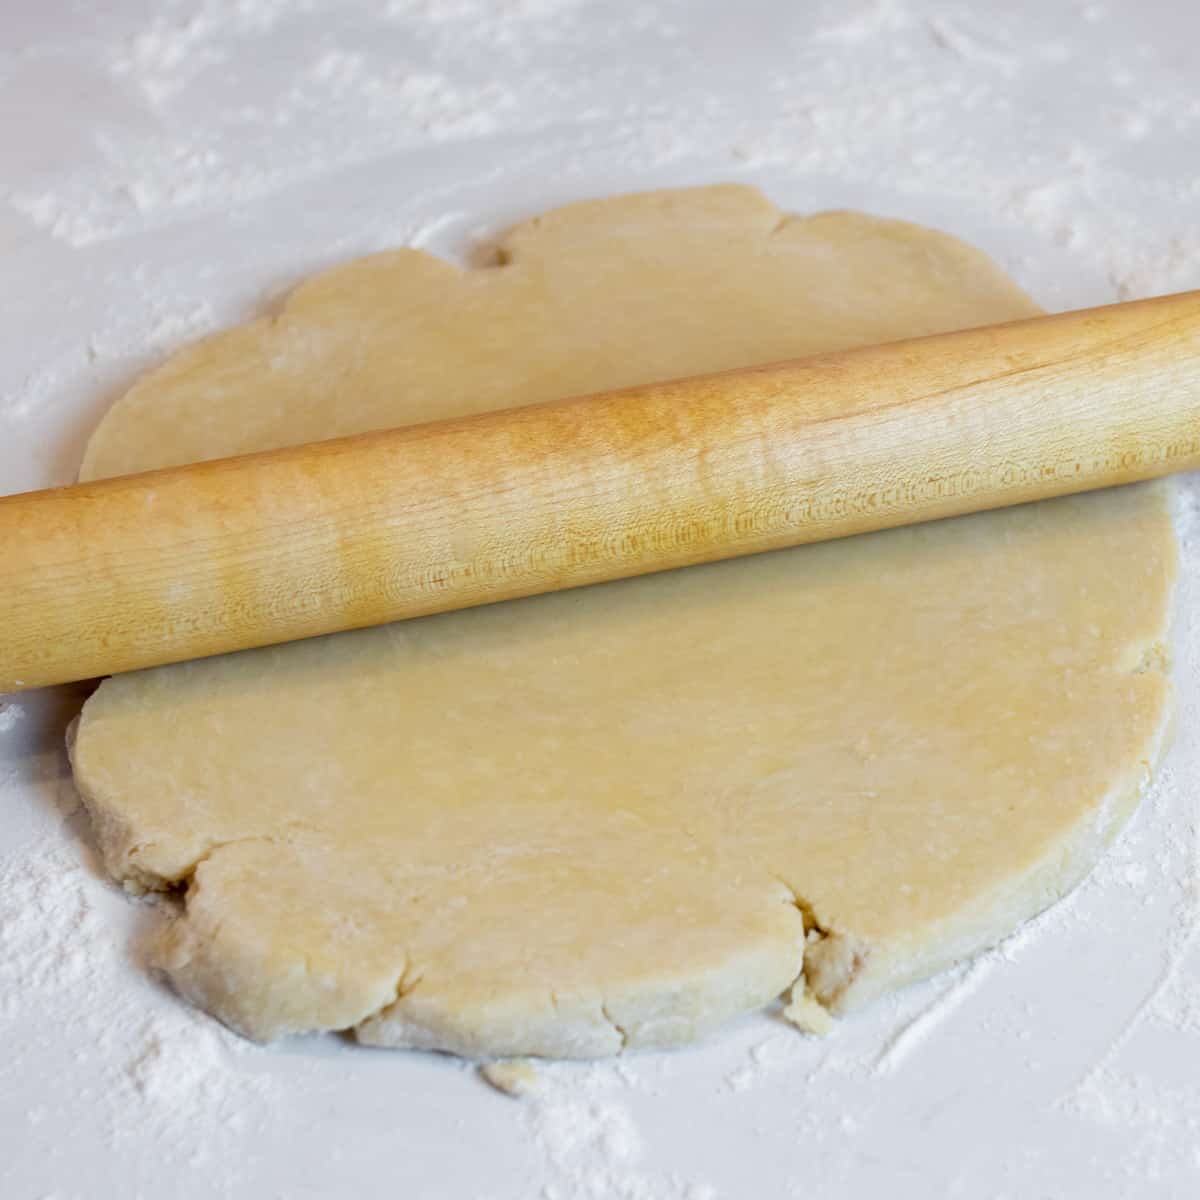
How To Roll Tart Pastry
Keeping the pastry dough in the fridge for at least an hour will really help the dough roll easily I often keep it in the fridge for about 2 hours. When you are ready to roll the dough, take it our of the fridge and place it on a floured surface.
Use a rolling pin to gently roll the dough into a flat sheet that is 1/8 inch thick. I like to roll from the centre and roll out to the edge, from side side at a time. You can also rotate the circle of dough with your hands to make sure it is not sticking to the surface. Also, lifting the sides and throwing some more flour under will keep it from sticking.
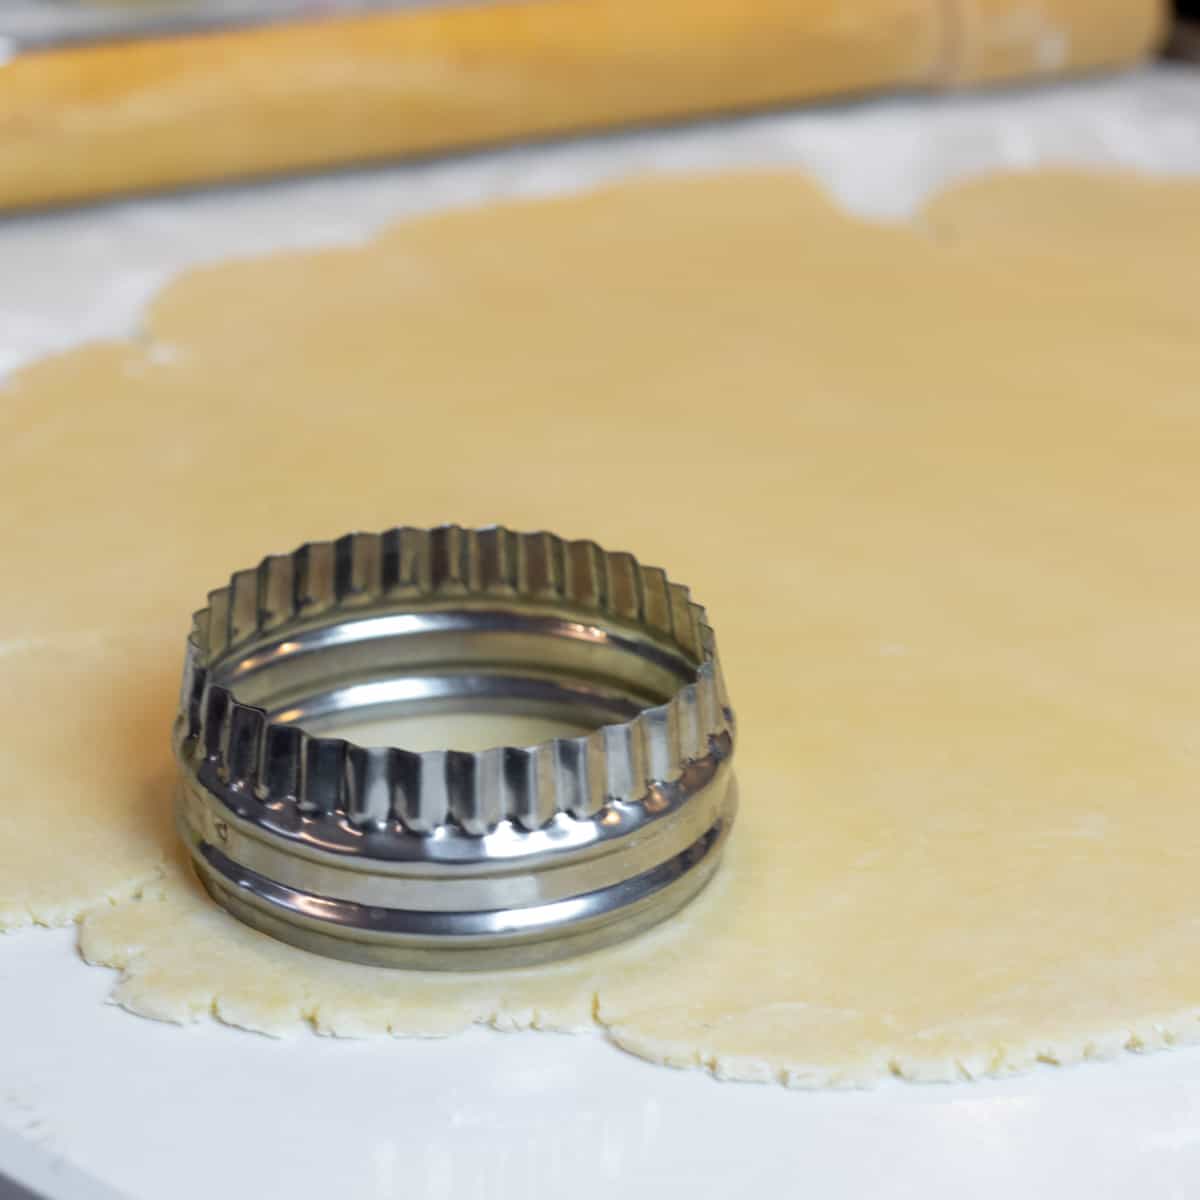
Cut Into Tart Shells
Once the dough has been rolled out to 1/8 inch thickness, they are ready to be cut into tart rounds. Get a circle biscuit cutter that is 3.5 inch in diameter.
If you do not have a circle biscuit cutter that is the right size, you can also use a coffee mug or glass to cut out tart shells. Just make sure tart shells are 3.5 inch in size.
Gently lift the tart shell off the surface. You can use a dough bench scraper or knife to get under the dough to lift up the shell.
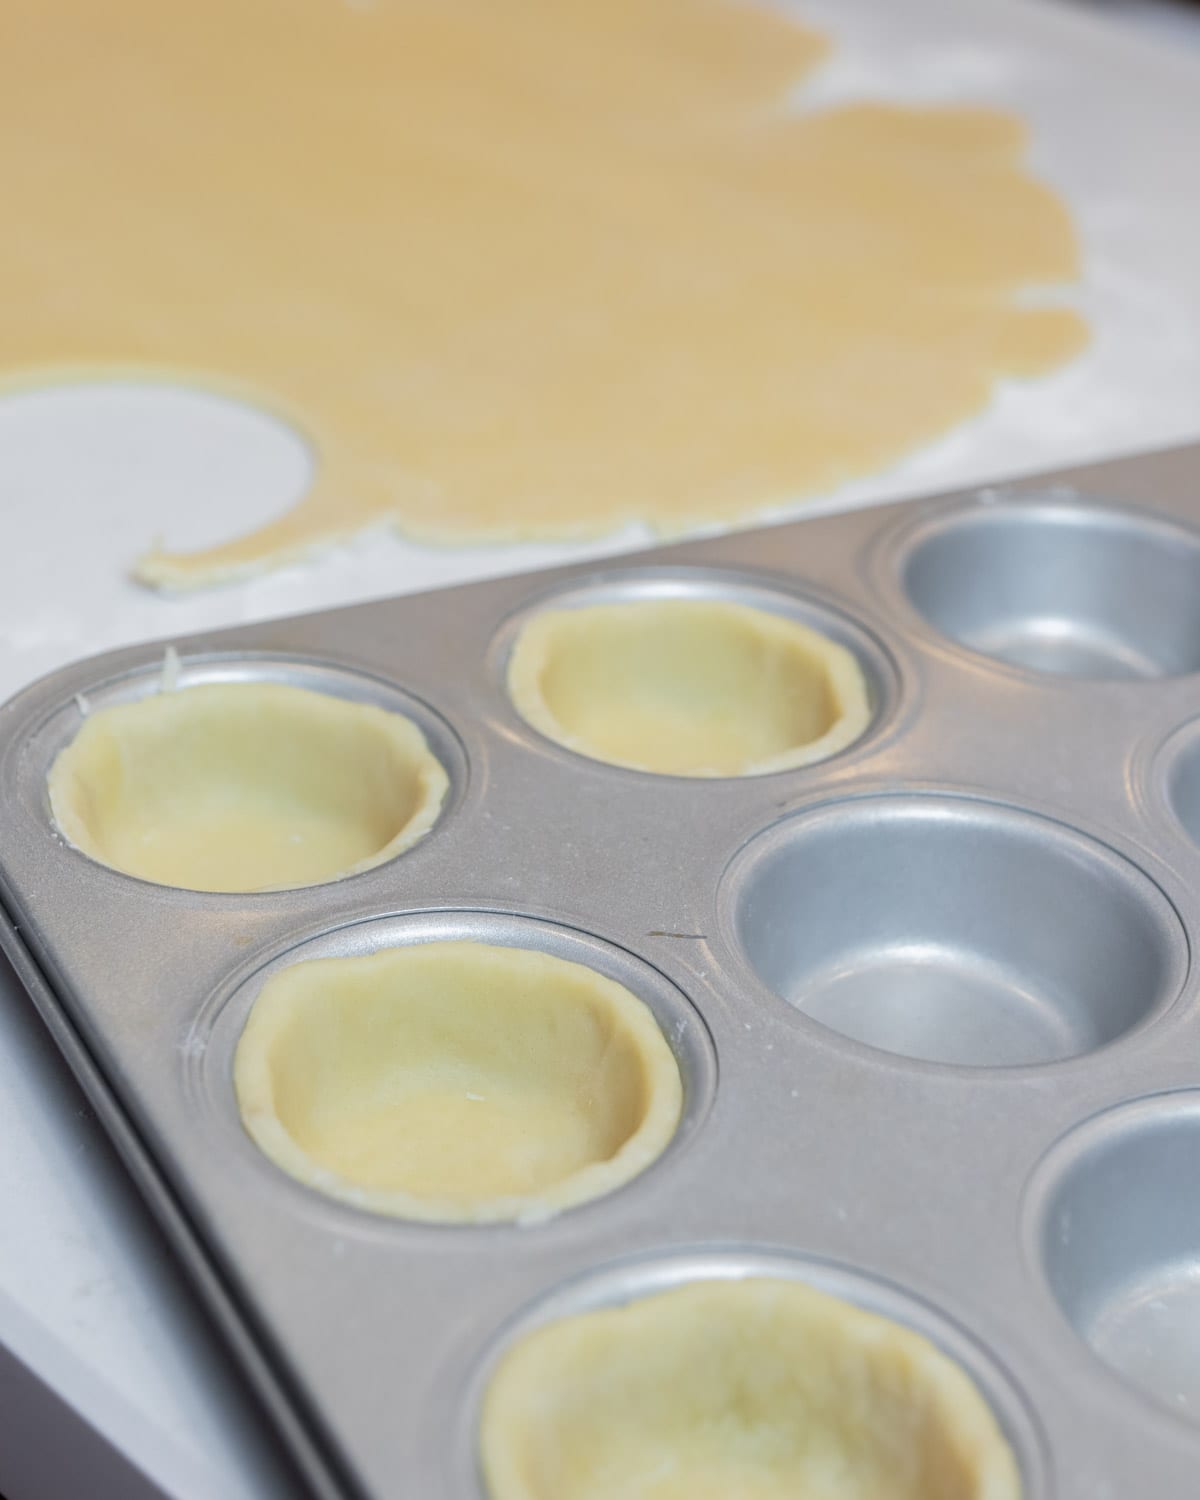
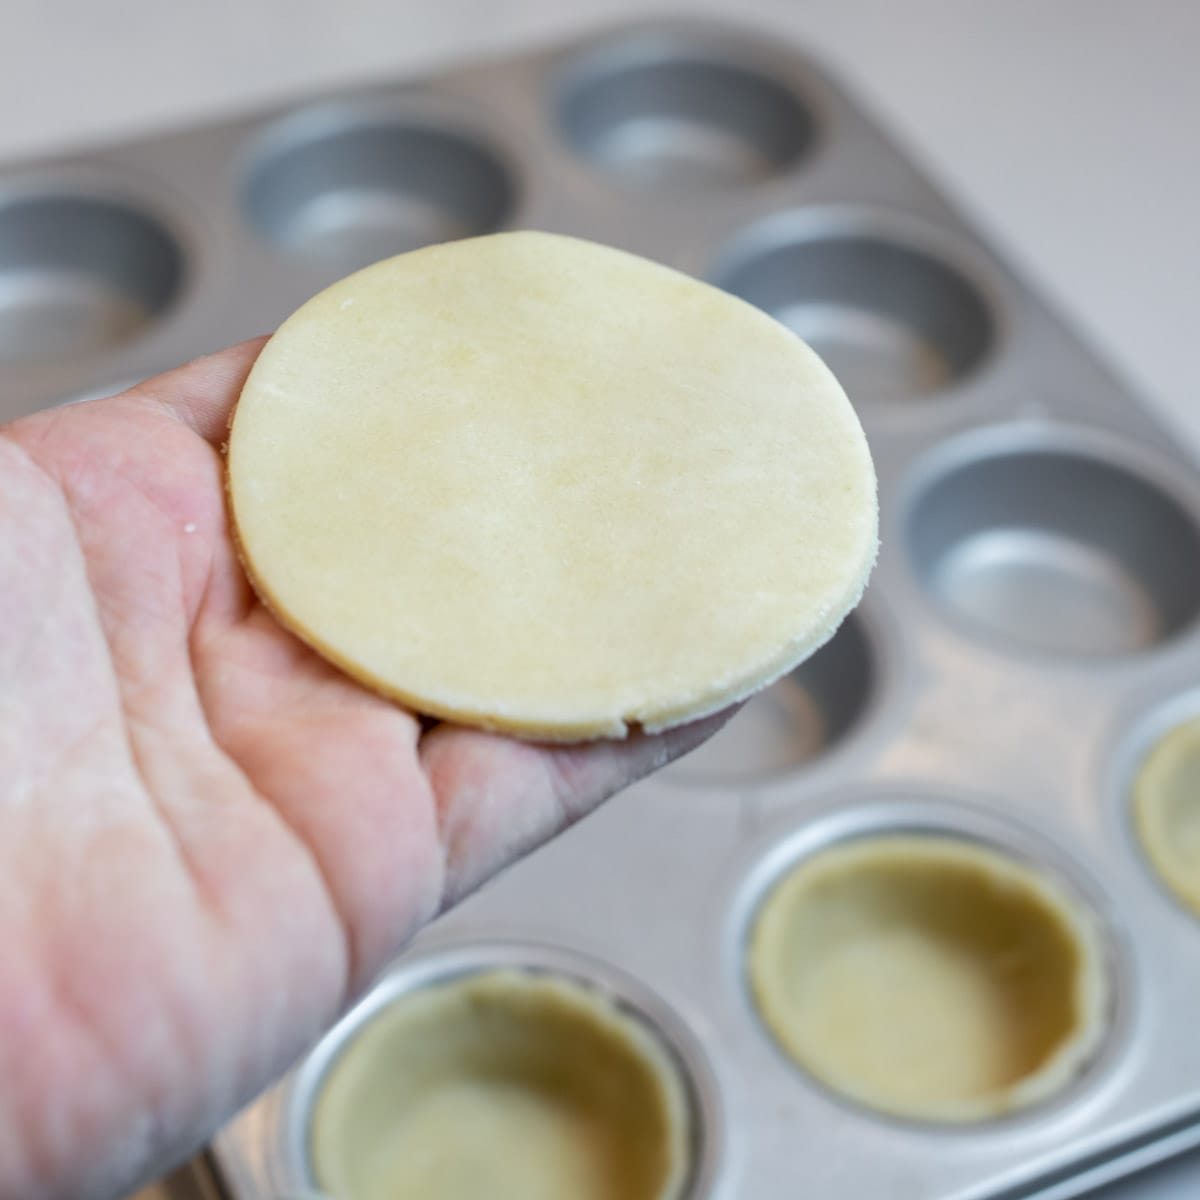
Place the Shells In The Muffin Tray
Take a cut pastry circle and place it in a muffin tray. Press it down gently making sure that it does not split or crack. Also, work the shell to the bottom of the well and along the sides so that there is no air between tart shell and the muffin tray.
Continue forming the tart shells in the tray. Once all the cut pastry circles have been made into tart shells, roll out the remaining dough and cut more circles. By the time all the dough has been rolled and cut, you should be able to get about 24 tart shells made.
How To Make Butter Tart Filling
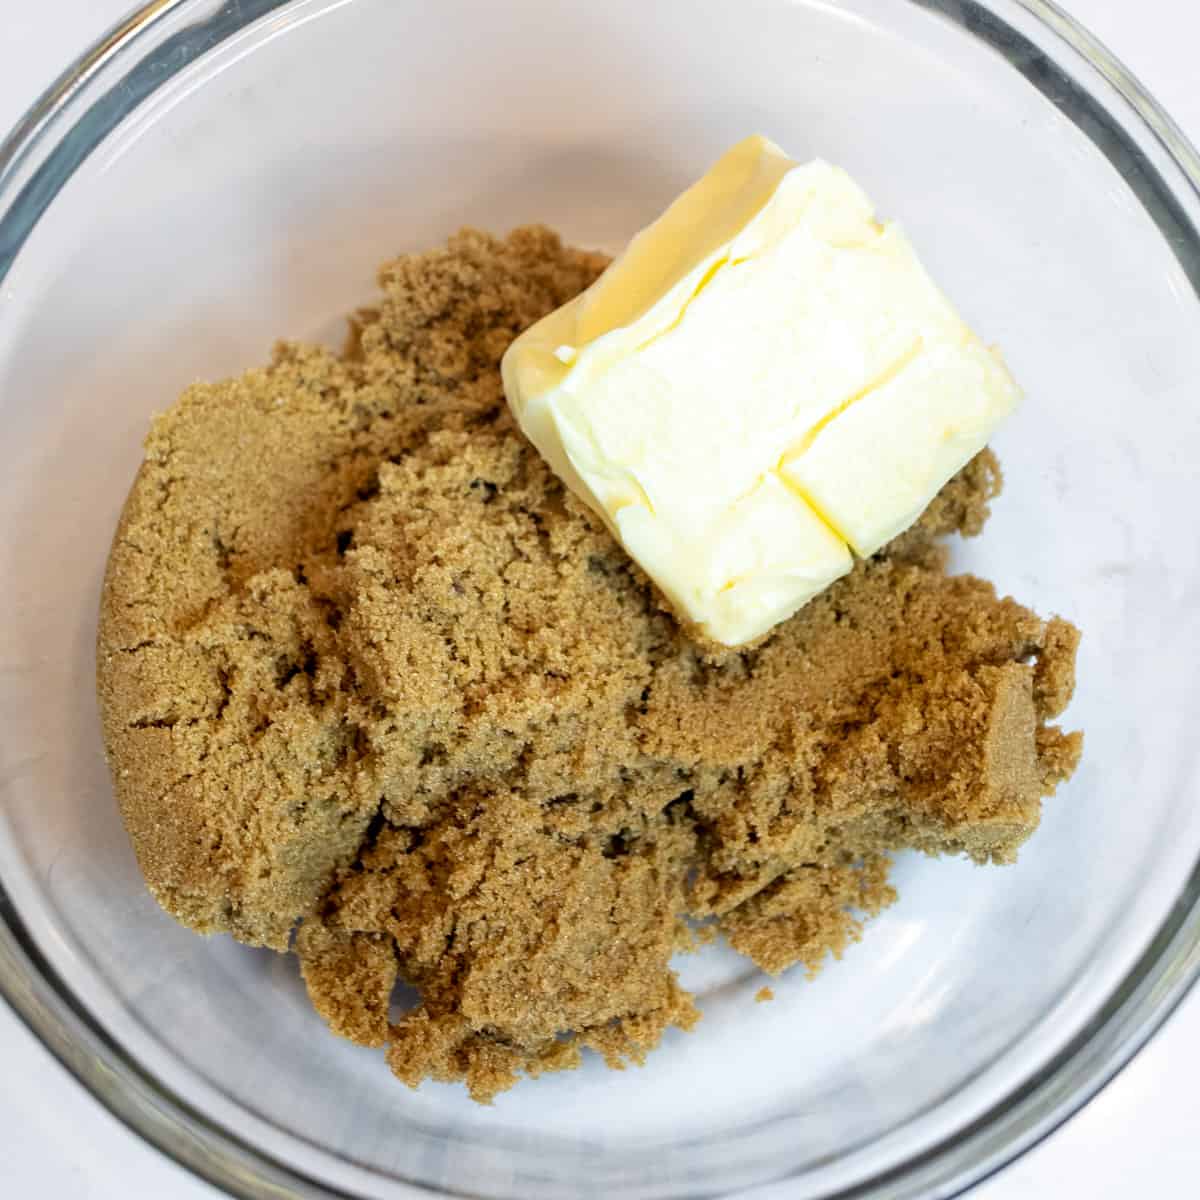
The first step to making the filing is to cream together the brown sugar with the softened butter. Mix well so that the butter is well combined with the sugar and you don’t see any more spots of butter.
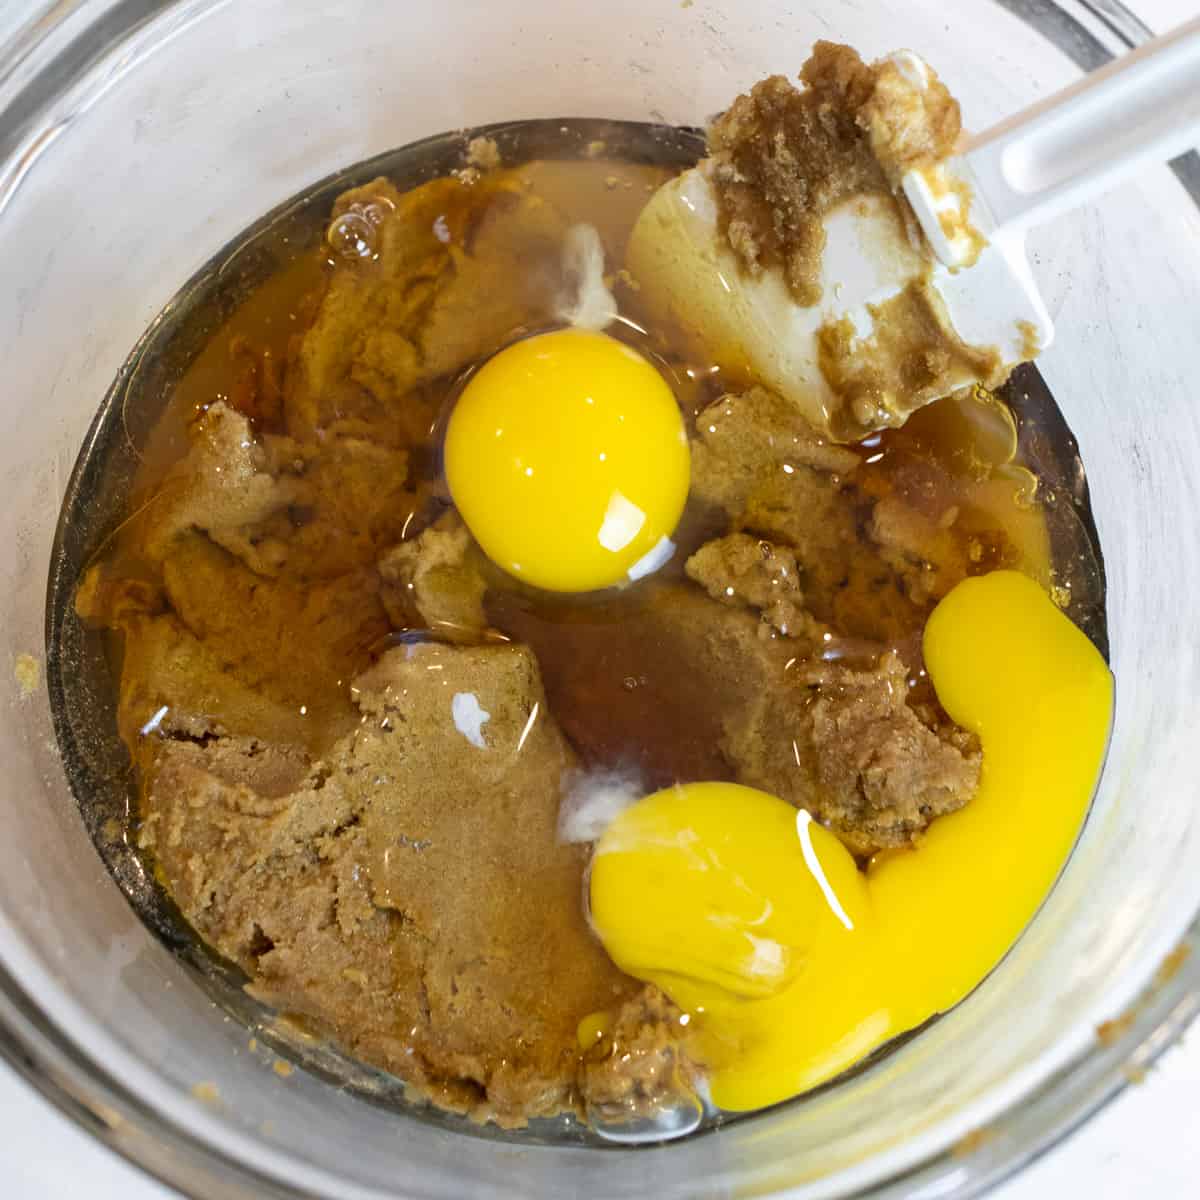
Next, mix in the corn syrup, vanilla, vinegar and eggs. First mix with a rubber spatula, then switch to a whisk.

Continue to stir with the whisk until the filling is a smooth consistency and there are no chunks of sugar or anything else.

Spoon Filling Into The Shells
Fill each of the tart shells about 2/3 to 3/4 full. Any more than that and the filling will rise up and go over the tops of the shells. I typically start by filling them 2/3 full and then once all the tart shells have filling, I split up whatever is left equally among the tarts.

Pecans, Raisins or Chocolate?
There are many different preferences for butter tarts. The classic way is for them to be plain without anything mixed into the filling. Plain butter tarts is my favourite way to enjoy them, but you could also add some chopped nuts, raisins and even chocolate chunks.
If you want to add some extras to the butter tarts, simply drop a tablespoon of your choice of stuff into the bottom of the shell before you pour in the filling. Then, pour the filling to be about 3/4 full.
How Long To Bake Butter Tarts
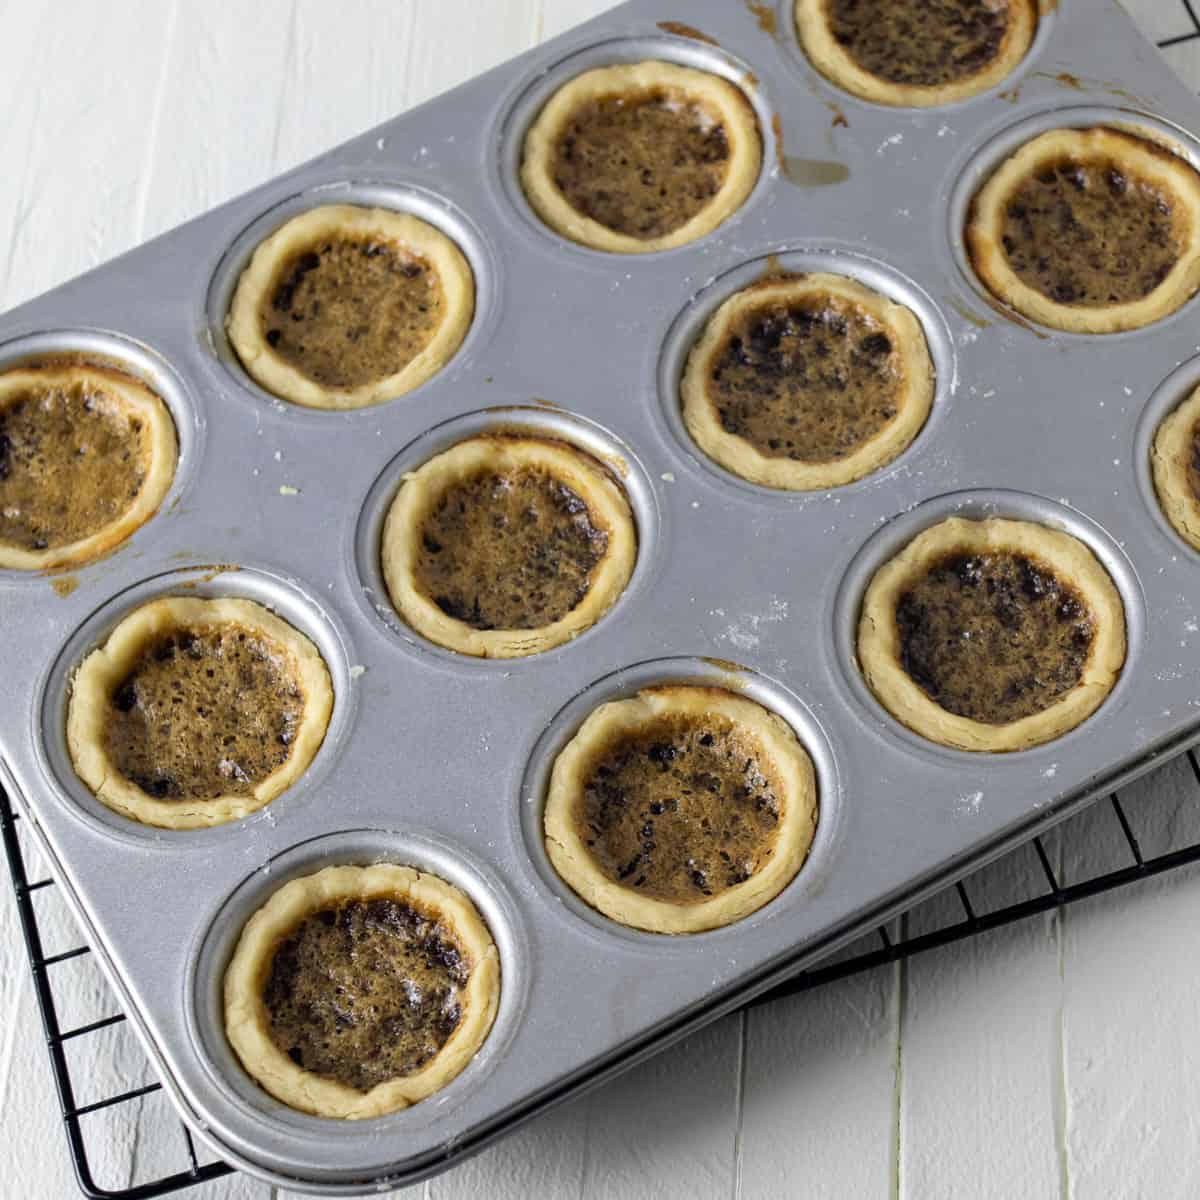
Preheat the oven to 350F and then add the butter tarts. Bake for 17-20 minutes, turning halfway through baking. You should notice the tart shells turning a golden brown and the filling will slightly puff up. The filling will settle back down once they come out of the oven.
The timing of the baking is critical to consistency of the filling. Each oven is different, so trial and error If the butter tarts are over baked, then the filling will be firm. Underbaked and the filling will be far too runny. In both ways, the butter tarts taste fine, but the consistency where the filling is smooth and glossy, but still thick enough to hold its shape, is what makes a butter tart truly great!
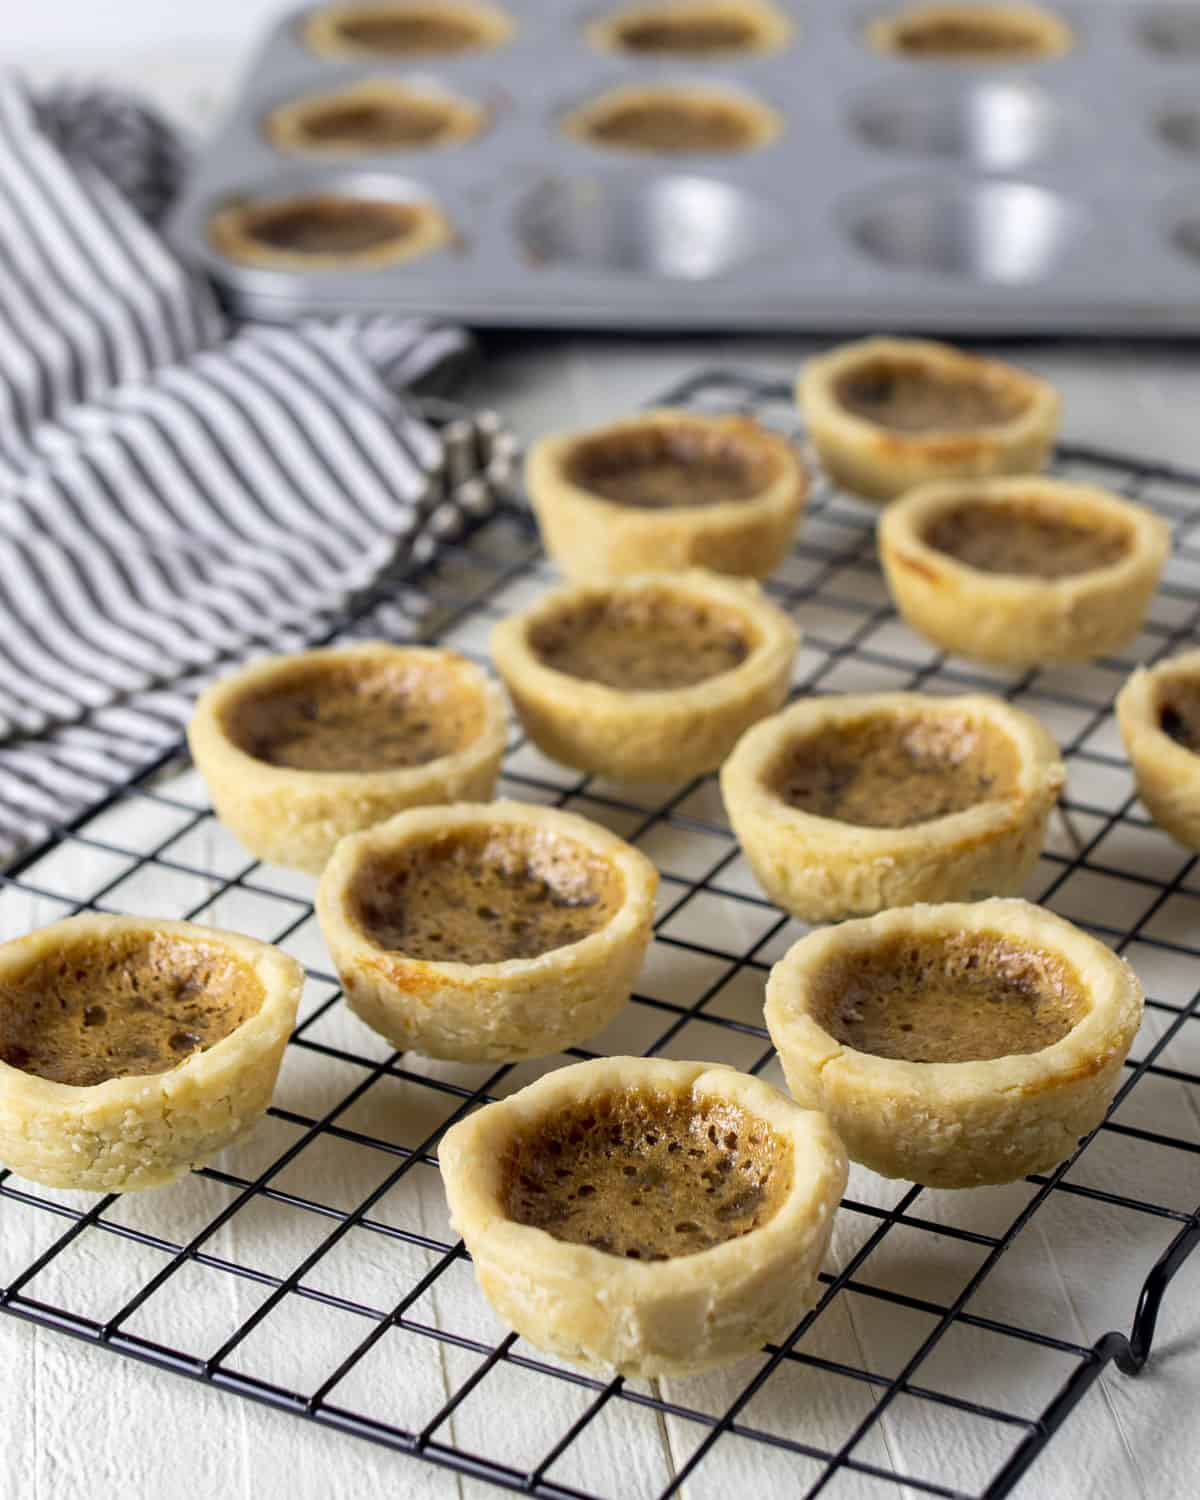
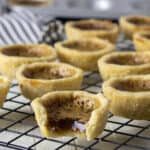
Once the butter tarts come out of the oven, place the muffin tray on a wire rack to cool slightly. Make sure that they cool completely prior to removing them from the tray. To remove the tarts, slide a butter knife along the sides of the butter tarts and they should lift out easily.
More Pie And Tart Recipes
If these butter tarts are causing you to crave more desserts with pie pastry, then check out these pies and tarts!
- Blueberry Pie – This is my ‘go-to’ pie. I love this pie with plump fresh blueberries and they are also great with wild or even frozen berries.
- Raspberry Pie – One of my most requested pies, this has the perfect flaky crust with the sweet and tart raspberry filling.
- Sweet Potato Pie – Similar to a pumpkin pie, but with lots of pecans mix in the filling. Perfect fall dessert and ideal for Thanksgiving.
- Butter Pecan Tassies
- Lemon Curd and Blueberry Tart – These are so fancy looking and taste incredible. The buttery crust goes perfect with the lemon curd filling.
- Pie Pastry Pinwheels – If you have some left over pastry, then these baked pinwheels are perfect. They are rolled up with some butter and cinnamon sugar. I will make a batch of pie pastry just to bake these pinwheels!
Butter Tarts
Ingredients
Tart Pastry
- 2 1/3 cups flour
- 1 tsp salt
- 1 cup shortening , cubed and chilled
- 1 egg
- 1 tbsp vinegar
- 2 tbsp water , ice cold
Filling
- 1 cup dark brown sugar
- 1/2 cup butter , softened
- 2/3 cup corn syrup
- 2 tbsp vinegar
- 1 tbsp vanilla
- 2 eggs
Instructions
Tart Pastry Instructions
- Place the flour and salt into a large mixing both. Whisk the salt into the flour.Add the cold shortening to the mixing bowl and use a pastry cutter to cut the shortening into the flour until it is a coarse meal consistency.
- In a small bowl, whisk the egg with 2 tbsp of water. Stir into the frour mixture. If needed, add an extra tablespoon or two to the pie dough. The dough should come together but not be too wet.
- Gather into a ball, cover with plastic wrap and place in a fridge to chill for at least one hour.
- Roll out the tart pastry on a floured surface to about 1/8 inch thickness. Use a 3 1/2 inch round cutter or a wide enough glass. Take each cut pastry circle and gently press into a non stick muffin tin. Press down to ensure the bottom is flat and press along the sides. Try to make sure there are no air pockets. Do this with the remaining pastry. You should be able to get around 24 tart shells.
Filling Instructions
- In a large mixing bowl, cream together the dark brown sugar and the softened butter until smooth and creamy.
- Mix in the corn syrup, eggs, vanilla, and vinegar with the sugar and butter mixture until smooth and well combined.
- Spoon some of the filling into each butter tart shell up to about 2/3 full.
- Bake in a 350F preheated oven for 17-20 minutes, turning halfway through baking. The sides of the pastry should be a golden brown and the filling should puff up slightly.
- Remove from the oven and let cool completely before removing the butter tarts from the muffin tray.
Nutrition
Per serving: